amateur radio
cabling
DIY
do it yourself
electric
electrical
electricity
ham radio
radio amatur
wiring
#AmateurRadio, #CableTesting, #ChauvinArnoux, #DIYProjects, #ElectricalMaintenance, #ElectricalSafety, #ElectricalTesting, #Fluke, #HamRadio, #Hioki, #InsulationResistance, #insulationtest, #KleinTools, #Megger, #MeggerTesting, #PreventiveMaintenance, #SafeElectricalSystems, #TechTips, #VoltageTesting
9M2PJU
0 Comments
How to Use a Megger for Safe and Reliable Electrical Testing
How to Use a Megger for Safe and Reliable Electrical Testing
When it comes to ensuring the safety and reliability of electrical systems, whether you’re setting up your amateur radio station or working on DIY electrical projects, one tool stands out for its effectiveness—the Megger (or insulation resistance tester). This device is crucial for assessing the health of electrical insulation in wires, cables, and electrical components. In this post, we’ll walk you through everything you need to know about how to properly use a Megger, along with why it’s so essential in maintaining the integrity of your electrical systems.
What is a Megger?
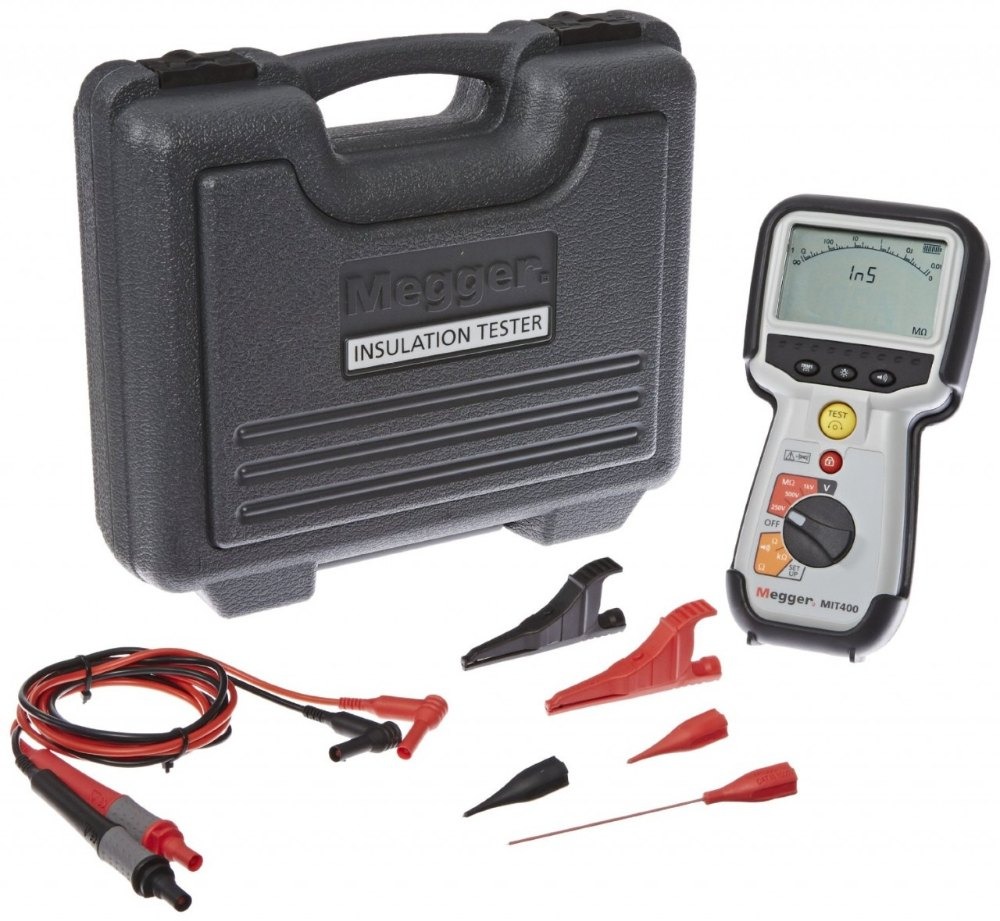
A Megger is a type of insulation resistance tester used to measure the quality of insulation in electrical systems. It works by applying a high-voltage DC signal (usually between 250V and 5kV) and measuring the resistance (in megaohms, MΩ) between the conductor and the ground. This is important because it helps you determine whether the insulation in your cables or equipment is in good condition or deteriorating over time due to factors like moisture, heat, or wear.
Whether you’re testing amateur radio equipment, home electrical installations, or industrial systems, using a Megger regularly ensures the safety and longevity of your electrical setup.
Why Use a Megger?
- Ensure Safety: Over time, insulation can degrade, leading to the potential for electrical shocks, short circuits, or even fire. The Megger helps you identify these problems early.
- Prevent Equipment Damage: Poor insulation can lead to power loss or damage to sensitive equipment, such as motors, generators, or radio transmitters. A Megger test can spot these issues before they escalate.
- Routine Maintenance: In environments where electrical equipment is exposed to harsh conditions (like high temperatures, moisture, or mechanical stress), testing insulation is part of preventive maintenance.
- Regulatory Compliance: For some installations, regular testing is required by safety standards and regulations. A Megger ensures that your electrical setup complies with those rules.
How to Use a Megger: A Step-by-Step Guide
1. Prepare for Testing
- Turn Off Power: Before using the Megger, ensure that the system is powered off. This avoids electrical interference and ensures safety during testing.
- Select Test Voltage: Choose the appropriate test voltage based on the type of system you’re testing. Common voltages are:
- 500V for low-voltage systems (e.g., household wiring).
- 1000V or higher for larger equipment (e.g., motors, transformers).
- Check the Megger: Ensure the Megger is in good working condition, with the test leads securely attached to the device.
2. Connect the Test Leads
- First Test Lead: Connect one lead to the conductor (the “live” side) of the equipment or cable you are testing.
- Second Test Lead: Attach the other lead to the grounded part of the equipment or system (e.g., the metal frame, grounding rod, or sheath of the cable).
3. Set Up the Test
- Configure the Megger: Set the Megger to the appropriate test voltage. If you’re unsure, refer to the manufacturer’s guidelines for the correct test voltage for the equipment you’re testing.
- Initiate the Test: Press the start button or turn the dial to begin the test. The Megger will apply a high-voltage signal and measure the resistance of the insulation.
4. Monitor and Interpret the Results
- Reading the Resistance: The Megger will display the insulation resistance value, usually in Megaohms (MΩ). A high resistance (above 1 MΩ) indicates that the insulation is in good condition, while a low resistance suggests that the insulation is degraded or damaged.
- Good Insulation: A reading above 1 MΩ (depending on the device or system you’re testing) typically indicates healthy insulation.
- Damaged Insulation: A reading that is too low, or close to 0 MΩ, indicates that the insulation has broken down, and you may need to repair or replace the wiring or equipment.
5. Complete the Test
- Disconnect the Leads: Once the test is complete, disconnect the test leads from the equipment.
- Record the Results: Document the insulation resistance readings for future reference or maintenance logs.
- Test Additional Components: If you’re testing multiple components, repeat the process for each one.
6. Power Up the System
- If the insulation is in good condition, you can safely reconnect the power supply to the equipment. If issues were found, address the problem before re-energizing the system.
Key Tips for Effective Megger Testing
- Wait for Stable Readings: When testing larger equipment or cables, the resistance readings may fluctuate initially. Allow time for the measurement to stabilize before recording the result.
- Test for Moisture: If you suspect moisture is affecting the insulation (e.g., in outdoor or industrial environments), the Megger can help detect the problem by showing lower resistance readings.
- Test Equipment Before Use: If you’re using the Megger for the first time, test it on a known, good system to ensure the device is functioning properly.
- Use the Right Voltage: Always ensure you’re using the correct test voltage for the system you’re testing. Too low a voltage might not detect faults, while too high a voltage could damage delicate equipment.
- Regular Testing: For systems with heavy use or those exposed to harsh conditions, make Megger testing part of a routine maintenance schedule to detect issues before they lead to system failure.
Top Megger Brands to Consider
When choosing a Megger, it’s important to go for trusted brands known for their quality and reliability. Here are some top Megger brands widely used in the industry:
- Megger (the brand itself): Known for pioneering the insulation resistance testing field, Megger offers a wide range of testers, from portable models for everyday use to high-voltage models for industrial systems.
- Example models: MIT400 Series, IR4055, TTR100
- Fluke: Fluke is a leading manufacturer of electrical testing instruments, including insulation testers that are commonly used in both industrial and residential settings.
- Example models: Fluke 1507, Fluke 1555
- Chauvin Arnoux: This brand offers a variety of high-quality insulation testers suitable for electrical professionals, including their C.A. 6500 model.
- Example model: C.A. 6500
- Klein Tools: Known for their rugged and affordable electrical testing instruments, Klein Tools offers a selection of insulation testers aimed at DIY enthusiasts and professionals alike.
- Example model: Klein Tools 600V Insulation Tester
- Hioki: This Japanese brand offers precision testing equipment for both electrical and industrial applications. Their insulation resistance testers are highly regarded for their accuracy.
- Example model: Hioki IR4050
Conclusion
Using a Megger to perform insulation resistance testing is one of the most important steps you can take to maintain the safety and reliability of your electrical systems. Whether you’re working with amateur radio equipment, DIY electrical projects, or large industrial installations, regularly testing insulation ensures that your equipment runs smoothly and safely.
By following these simple steps and tips, you’ll be able to identify potential insulation issues before they cause major damage, helping to avoid costly repairs and ensuring that your setup remains fully operational.
Have you used a Megger in your electrical projects? Share your experiences or ask any questions in the comments below! For more tips and tricks on electrical safety, check out hamradio.my—your go-to resource for amateur radio and DIY electrical advice.


Post Comment