amateur radio
cabling
DIY
do it yourself
electrical
ham radio
homebrew
radio amatur
#AmateurRadio, #CableManagement, #CablePreparation, #DIYElectronics, #DIYProjects, #ElectricalInstallation, #ElectricalMaintenance, #ElectricalSafety, #Ferrules, #HamRadio, #HomeElectronics, #PowerDistribution, #RadioStationSetup, #SafeConnections, #TechTips, #TorqueTools, #WireStripping
9M2PJU
0 Comments
Proper Wire Preparation and Connection Techniques for Safe Electrical Installations in Amateur Radio and DIY Projects
When it comes to electrical installations, especially in amateur radio and DIY electronics, the quality of your connections directly impacts both the safety and performance of your setup. One critical step often overlooked is the correct preparation of cables before installing them into electrical devices like circuit breakers, switches, and power distribution blocks.
In this post, we will break down the best practices for preparing and installing electrical cables to ensure reliable, secure, and safe connections for your amateur radio station, DIY electronics projects, or any electrical installation.
Why Proper Cable Preparation Matters
Correctly preparing the end of a cable is essential for preventing common issues such as overheating, electrical arcing, and unreliable performance. Here’s what can go wrong if cable preparation is done improperly:
- Overheating: Loose or poorly prepared connections can increase resistance, leading to heat buildup and potential fire hazards.
- Voltage Drops: Poor contact may cause voltage fluctuations, affecting the performance of sensitive equipment.
- Damage to Components: Twisting the wire too tightly or improperly stripping it can cause damage to the conductor or terminal, reducing the lifespan of your installation.
- Safety Hazards: Incorrectly connected wires can result in short circuits or electric shocks, especially in high-voltage setups.
To avoid these issues, it’s essential to follow proper steps when preparing and connecting electrical cables to devices.
Step-by-Step Guide: How to Prepare and Install Electrical Cables
Here’s a simple, foolproof guide for amateur radio enthusiasts, DIYers, and anyone working with electrical installations:
1. Strip the Wire Properly
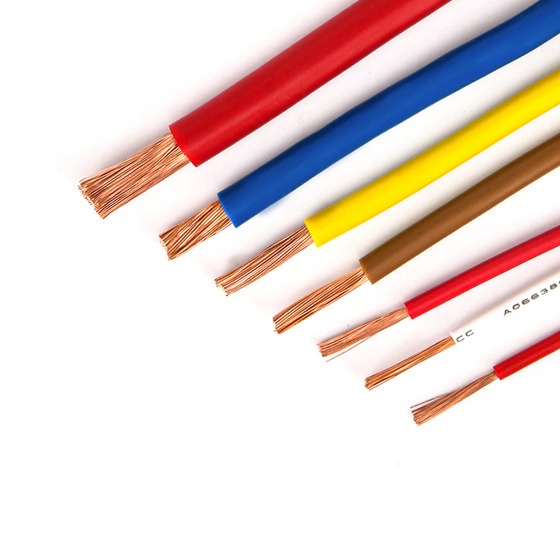
The first step in preparing a cable is to strip off the insulation. This exposes the wire’s conductive material and allows it to make proper contact with the terminal.
- Use the Right Tool: Always use a wire stripper to ensure clean, accurate removal of the insulation. Avoid using knives or other makeshift tools that can damage the wire.
- Don’t Over-Strip: Strip only as much insulation as needed to make the connection, usually just enough to fit into the terminal (as specified by the terminal’s manufacturer). Over-stripping can expose too much conductor, which could cause a short circuit or contact with unintended surfaces.
- Avoid Scraping the Conductor: Be careful not to scrape or nick the wire’s conductive material, as this can weaken the connection.
2. Avoid Twisting the Wire Strands
If you are working with multi-strand cables, do not twist the strands of the wire. Twisting can cause the individual strands to break or weaken, leading to poor contact and potential overheating.
- Straighten the Strands: Once the insulation is stripped, gently straighten the strands with your fingers. This ensures that all the strands will make good contact with the terminal, providing a solid electrical connection.
- Do Not Twist: Twisting the strands can lead to uneven pressure on the conductor and cause the wire to fail. This is especially important in multi-strand wires often used in amateur radio installations where reliability is critical.
3. Use a Ferrule (If Needed)
For multi-strand wires, especially those with fine strands, using a ferrule is highly recommended. A ferrule is a small metal sleeve that helps secure the strands of the wire, preventing them from fraying and ensuring better contact with the terminal.
- What is a Ferrule?: A ferrule is a metal sleeve that is crimped over the wire’s exposed strands. This keeps the strands together and ensures the wire remains in good condition, making it easier to insert into a terminal.
- When to Use a Ferrule: Ferrules are especially useful when working with fine or flexible wires, like those used in amateur radio or small electronics projects. They can also help prevent accidental short circuits by reducing the chance of stray strands coming into contact with other parts.
4. Insert the Wire Correctly
Once the wire is prepared, the next step is to insert it into the terminal or device.
- Full Insertion: Ensure the stripped end of the wire is fully inserted into the terminal. This ensures maximum surface contact between the conductor and the terminal, providing a reliable and safe electrical connection.
- Alignment: Make sure the wire is aligned properly with the terminal. The conductors should sit flat against the terminal, not twisted or bent at an awkward angle.
5. Tighten the Terminal to the Correct Torque
After inserting the wire into the terminal, use the appropriate tool to tighten the screw or clamp to the correct torque specification.
- Use a Torque Wrench: A torque wrench or screwdriver helps ensure you tighten the screw to the manufacturer’s recommended torque, preventing under-tightening or over-tightening. Both can lead to poor connections or damage.
- Avoid Over-tightening: Too much force can damage the conductor or terminal, leading to stripped threads, broken components, or damaged insulation. Under-tightening can cause loose connections that may overheat or lead to arcing.
- Refer to Specifications: Always refer to the device’s or terminal’s manual for the recommended torque values.
6. Inspect the Connection
Once the wire is tightened, inspect the connection carefully.
- Visual Check: Ensure that no strands of the wire are frayed or exposed outside the terminal. Also, check that the wire is fully inserted into the terminal and that there is no movement.
- Pull Test: Gently tug on the wire to make sure it is securely connected. The wire should not pull out of the terminal or shift position.
7. Secure the Cable Properly
Lastly, secure the cable to prevent it from being pulled or moved, which could loosen the connection over time.
- Cable Management: Use cable clips, ties, or conduits to keep the wire neatly organized and out of harm’s way. Avoid tight bends that could damage the wire or strain the connection.
- Avoid Tension: Ensure the cable is not under tension, as this could affect the connection or cause it to fail prematurely.
Conclusion: Proper Cable Preparation Ensures Safety and Reliability
Proper wire preparation is an essential part of any electrical installation, whether it’s for your amateur radio setup, DIY electronics project, or home electrical work. By following the right steps—stripping the wire correctly, avoiding twisting, using ferrules when needed, and ensuring proper torque tightening—you can ensure that your connections are safe, reliable, and long-lasting.
By following these guidelines, you not only protect your equipment but also minimize the risk of electrical hazards, ensuring that your installations will operate efficiently and safely for years to come.
Have you tried these cable preparation techniques in your amateur radio or DIY projects? Let me know how they worked for you in the comments below or visit hamradio.my for more tips and resources on safe electrical installations!



Post Comment