amateur radio
container
docker
dx cluster
dxspider
ham radio
9m2pju, AmateurRadio, AmateurRadioProjects, Containerization, DIYRadio, Docker, DockerDeployment, DXCluster, dxspider, DXSpotting, hamradio, HamRadioCommunity, networking, opensource, RadioExperimentation, RadioNetworking, RadioOperators, RadioSoftware, RadioTech, technology
9M2PJU
0 Comments
The 9M2PJU-DXSpider-Docker Project
Revolutionizing Amateur Radio DX Clustering with Docker
Amateur radio operators are always looking for ways to enhance their experience and improve their stations. The 9M2PJU-DXSpider-Docker project does just that, by revolutionizing the way we deploy and manage DX Cluster nodes using Docker. This project brings the powerful DXSpider software into a seamless, containerized setup, making it easier than ever for operators to set up, maintain, and join the global DX network.
Whether you’re an experienced ham or just starting, this project eliminates the complexity of traditional DXSpider installation, ensuring you can get up and running quickly with minimal hassle. The best part? It preserves all the rich functionality of DXSpider, a trusted tool for real-time amateur radio DX spot monitoring and clustering.
Why Choose the 9M2PJU-DXSpider-Docker Solution?
If you’re wondering why you should opt for this Docker-based solution, here’s why:
- Minimal Configuration Deployment: Get your system up and running in just minutes.
- Security Focused: The Docker configuration ensures a secure environment, keeping your system safe from potential vulnerabilities.
- Easy Updates: Stay up to date with ease, avoiding the headaches of manual patching.
- Global Community: Connect with operators worldwide and join the thriving DX cluster network.
Key Features of 9M2PJU-DXSpider-Docker
Docker-Native Architecture
With a streamlined, multi-stage build, this project optimizes the DXSpider software to run efficiently in Docker containers. The minimal base image reduces the attack surface, and environment-based configuration ensures everything works right out of the box.
Intelligent Defaults
The container is pre-configured for optimal performance, so you don’t need to worry about complex tuning. The setup is smart enough to automatically scale based on your available system resources, and it handles port management without requiring manual configuration.
Effortless Installation
Installation couldn’t be simpler. You’ll need just two tools to get started: Docker Engine 20.10+ and Docker Compose v2.0+.
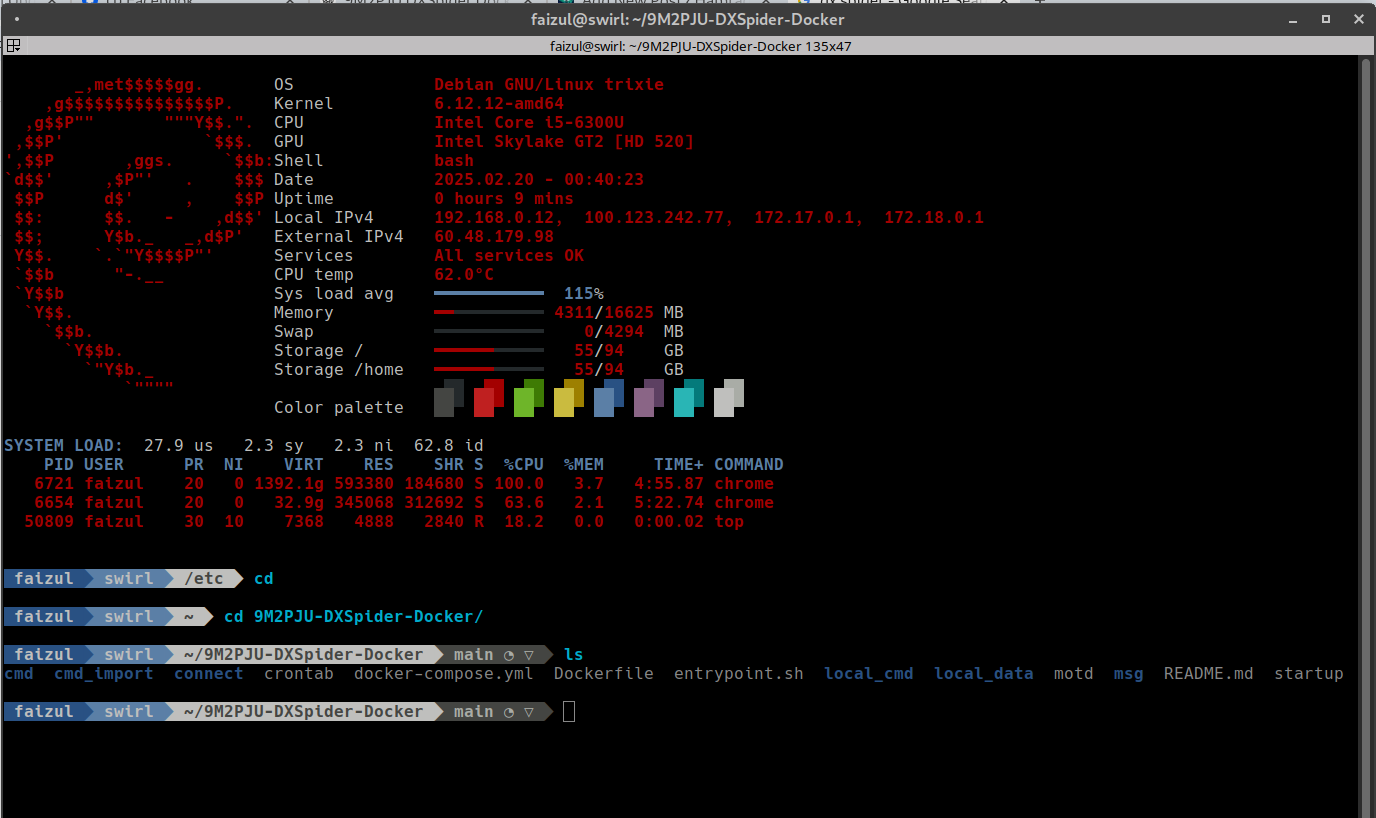
Getting Started with 9M2PJU-DXSpider-Docker
Step 1: Clone the Repository
Start by cloning the project repository to your local machine:
git clone https://github.com/9M2PJU/9M2PJU-DXSpider-Docker.git
cd 9M2PJU-DXSpider-Docker
Step 2: Configure Your Settings
Configure the environment settings by editing the .env file:
nano .env
This file allows you to set various configuration options for your setup.
Step 3: Set Up Cron Jobs and Startup Scripts
For automated operations, configure cron jobs and startup scripts:
nano startup
nano crontab
Step 4: Deploy the Container
Now it’s time to deploy the container using Docker Compose. This command will build the container and run it in the background:
docker compose up -d --build
Step 5: Verify Installation
To check if everything is working correctly, you can monitor the container logs:
docker compose logs -f
Connecting to Your DX Cluster
Once your container is up and running, you can connect to it using any DX Cluster client. Some popular options include:
- N1MM Logger+
- DXTelnet
- CC Cluster
- Log4OM
Simply use the following connection details:
- Host: Your server’s IP address
- Port: 7300 (the default DXSpider port)
Configuration Options
The Docker setup comes with a few key configuration parameters that you can tweak to suit your needs:
| Parameter | Description | Default Value |
|---|---|---|
| DX_CALLSIGN | Your node’s callsign | 9M2PJU-10 |
| DX_PORT | The listening port for incoming connections | 7300 |
These options can be easily adjusted within the .env file to reflect your unique setup.
Updates & Maintenance
Keeping your container up to date is straightforward:
- Stop and remove the container:
docker compose down - Rebuild and restart the container:
docker compose up -d --build
This ensures that you’re always running the latest version of DXSpider.
How to Contribute
The 9M2PJU-DXSpider-Docker project is open-source, and contributions are welcome! Here’s how you can contribute:
- Fork the repository
- Create a feature branch
- Commit your changes
- Push your branch
- Create a Pull Request
We’re always looking for ways to improve, and your contributions help make this project even better!
Support the Project
If you find the 9M2PJU-DXSpider-Docker project helpful, please consider supporting it in the following ways:
- ⭐ Star the repository to show your support
- 🔀 Fork the project and contribute to its growth
- 📢 Share it with other amateur radio operators to spread the word
Contact and Support
If you need any help or have questions, feel free to reach out:
- Author: 9M2PJU
- Website: hamradio.my
- GitHub: @9M2PJU
- Email: [email protected]
License
The project is licensed under the MIT License. For more details, check the LICENSE file.
Made with ❤️ by the Amateur Radio Community
73 de 9M2PJU 📡


Post Comment