How to Install Wavelog Using Docker for Amateur Radio Logging
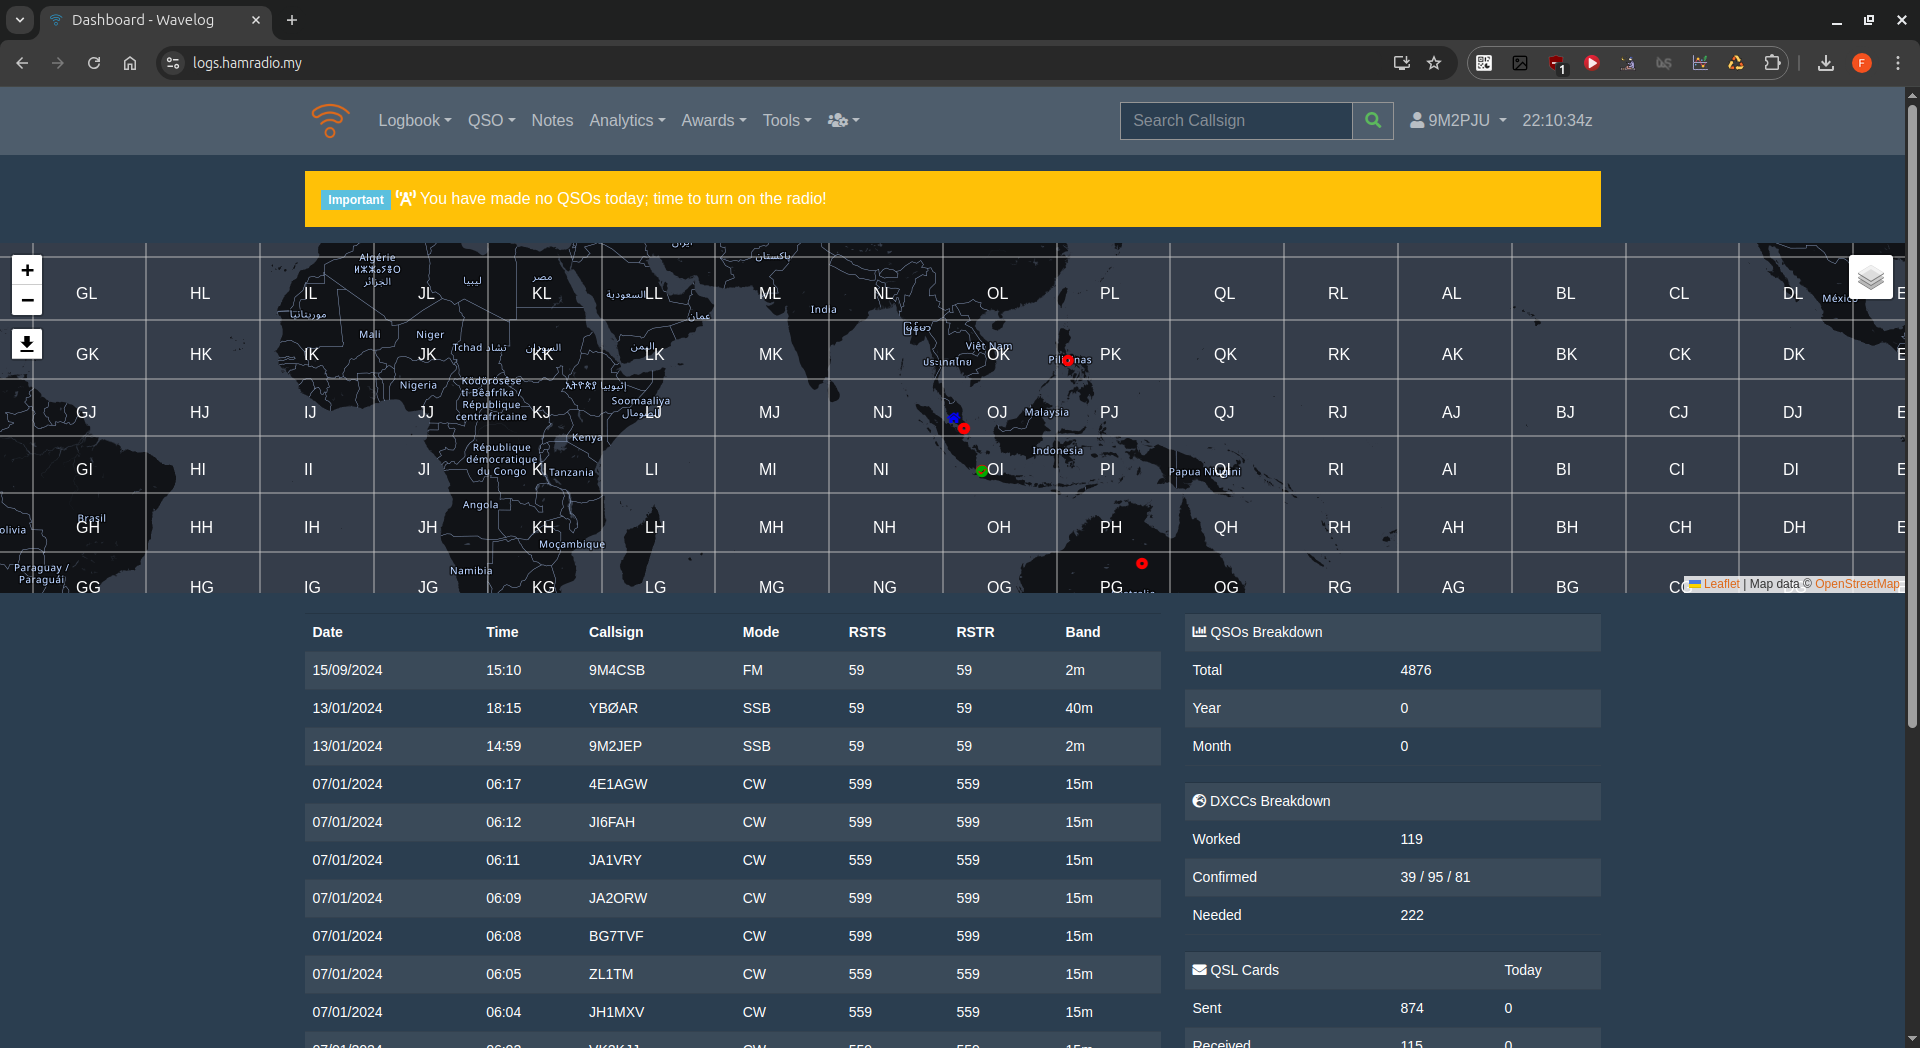
Wavelog is a self-hosted PHP application designed for Amateur radio operators to log their contacts efficiently. It is an enhanced fork of Cloudlog by 2M0SQL and provides a web-based interface that allows logging QSOs from anywhere with an internet connection. Wavelog supports integrations with various online services such as ClubLog, QRZ, eQSL, HRDLog, and LotW. It is built using CodeIgniter 3 and Bootstrap 5, making it a lightweight yet powerful solution for ham radio enthusiasts.
One of Wavelog’s key features is its compatibility with a Docker-based deployment, which simplifies installation and management. By running Wavelog in a Docker container, users can ensure a consistent and portable environment without worrying about dependency conflicts.
This guide will walk you through the steps to install Wavelog using Docker on a Linux-based system.
Prerequisites
Before proceeding, ensure that you have the following installed on your system:
- A Linux-based operating system (Debian, Ubuntu, CentOS, etc.)
- Docker and Docker Compose installed
- A stable internet connection
Step 1: Install Docker and Docker Compose
If Docker is not already installed, you can install it using the following commands:
sudo apt update
sudo apt install docker.io docker-compose-plugin -y
Enable and start the Docker service:
sudo systemctl enable --now docker
Verify the installation:
docker --version
docker compose version
Step 2: Create a Docker Compose File
Create a directory for Wavelog and navigate into it:
mkdir ~/wavelog && cd ~/wavelog
Create a new docker-compose.yml file:
nano docker-compose.yml
Copy and paste the following content into the file:
services:
  wavelog-db:
    image: mariadb:11.3
    container_name: wavelog-db
    environment:
      MARIADB_RANDOM_ROOT_PASSWORD: yes
      MARIADB_DATABASE: wavelog
      MARIADB_USER: wavelog
      MARIADB_PASSWORD: wavelog # <- Insert a strong password here
    volumes:
      - wavelog-dbdata:/var/lib/mysql
    restart: unless-stopped

  wavelog-main:
    container_name: wavelog-main
    image: ghcr.io/wavelog/wavelog:latest
    depends_on:
      - wavelog-db
    environment:
      CI_ENV: docker
    volumes:
      - wavelog-config:/var/www/html/application/config/docker
      - wavelog-uploads:/var/www/html/uploads
      - wavelog-userdata:/var/www/html/userdata
    ports:
      - "8086:80"
    restart: unless-stopped

volumes:
  wavelog-dbdata:
  wavelog-uploads:
  wavelog-userdata:
  wavelog-config:
Save and exit (CTRL+X, then Y, then ENTER).
Step 3: Start Wavelog
Run the following command to start Wavelog:
docker compose up -d
This will pull the required images and start the Wavelog instance. To verify that the containers are running, use:
docker ps
Step 4: Access Wavelog
Once the setup is complete, open your web browser and navigate to:
http://localhost:8086
If you are running this on a remote server, replace localhost with the server’s IP address.
Follow the on-screen setup instructions and use the database credentials specified in docker-compose.yml:
- Database Host:
wavelog-db - Database Name:
wavelog - Username:
wavelog - Password: (use the value set in
MARIADB_PASSWORD)
Step 5: Configure Reverse Proxy (Optional)
If you are hosting Wavelog on a server and want to access it using a domain name, configure an Nginx reverse proxy. Below is an example Nginx configuration:
server {
    listen 80;
    server_name wavelog.example.com;
    location / {
        proxy_set_header Host $host;
        proxy_set_header X-Real-IP $remote_addr;
        proxy_set_header X-Forwarded-For $proxy_add_x_forwarded_for;
        proxy_set_header X-Forwarded-Proto $scheme;
        proxy_pass http://localhost:8086;
    }
}
Restart Nginx after applying the configuration:
sudo systemctl restart nginx
Step 6: Updating Wavelog
To update Wavelog, follow these steps:
docker compose down
docker pull ghcr.io/wavelog/wavelog:latest
docker compose up -d
This will pull the latest version and restart Wavelog with the new image.
Troubleshooting
Check logs for any issues:
docker logs --follow wavelog-main
If you need to increase logging details, edit config.php inside the Wavelog configuration volume.
Conclusion
By following these steps, you have successfully set up Wavelog using Docker for logging amateur radio contacts. This setup ensures a stable and scalable environment while simplifying updates and maintenance. Enjoy using Wavelog for your QSO logging needs!
For more information, visit https://github.com/wavelog/wavelog.


Post Comment