amateur radio
ham radio
noise
radio amatur
amateur radio, EMF meter, EMI, ferrite choke, field strength meter, gauss meter, ham radio, ham radio troubleshooting, HF radio, LED light interference, noise hunting, power line noise, radio interference, radio noise floor, RF current probe, RF noise, RFI, sdr, solar inverter noise, spectrum analyzer, switching power supply noise, tesla meter, UHF radio, VHF radio
9M2PJU
0 Comments
Measuring Radio Noise and Interference in Amateur Radio: Field Strength Meter, Gauss Meter, and Better Tools
Noise is one of the biggest enemies of amateur radio. A station can have a good transceiver, a properly installed antenna, quality coaxial cable, and careful grounding, yet still suffer from buzzing, whining, clicking, pulsing, or wideband hash across the bands. Sometimes the interference comes from inside the shack. Sometimes it comes from a device in the house. Sometimes it comes from a neighbor, a solar inverter, a power line fault, or an industrial source nearby.
When this happens, many radio amateurs ask the same practical question: how do I measure this noise? Can I use a field strength meter? Is an EMF meter enough? What about a gauss meter or tesla meter?
The short answer is this: for amateur radio interference, a radio-frequency field strength meter, SDR, spectrum analyzer, or receiver with a suitable antenna is normally more useful than a gauss meter or tesla meter. But the details matter, because not all meters measure the same thing, and not all interference enters your station in the same way.
To solve a noise problem, you need to understand what you are measuring, where the noise is entering, and whether it is being radiated through the air, conducted along cables, or generated inside your own equipment.
What “Noise” Means in Amateur Radio
In amateur radio, noise usually means unwanted electrical or electromagnetic energy that raises the receiver’s noise floor or masks the signal you want to hear. It may appear as a steady hiss, harsh buzz, ticking sound, whining tone, repeated pulses, drifting carrier, or broad band of hash on the waterfall.
Some noise is natural. Atmospheric noise, lightning crashes, solar activity, and galactic background noise are part of radio. But many modern noise problems are man-made. Switch-mode power supplies, LED lights, solar inverters, battery chargers, computers, routers, plasma TVs, motor controllers, and bad power-line hardware can all generate interference.
A good measurement process tries to answer four questions:
- What frequency or band is affected?
- How strong is the noise?
- When does it happen?
- Where is it coming from?
The answer to those questions is usually more useful than a single meter reading.
Field Strength, Gauss, EMF, and Tesla Meters: What Is the Difference?
These meter names are often mixed together, but they are not the same.
A field strength meter, in radio work, usually means a meter that measures the strength of a radio-frequency electromagnetic field. It may read in microvolts per meter, dBµV/m, volts per meter, or sometimes only on a relative scale. This is the type of meter most relevant to amateur radio because it measures RF energy in the environment.
A gauss meter measures magnetic field strength, usually in gauss or milligauss. It is useful for checking magnets, motors, transformers, power wiring, and low-frequency magnetic fields. However, it is usually not the correct tool for diagnosing interference on HF, VHF, or UHF amateur bands.
A tesla meter is similar to a gauss meter. It also measures magnetic flux density, but in tesla, millitesla, or microtesla. The unit conversion is simple:
1 tesla = 10,000 gauss
So a gauss meter and a tesla meter are basically in the same family. They measure magnetic fields, not necessarily radio-frequency interference.
An EMF meter is the confusing one. EMF means electromagnetic field, so the name sounds broad. Some EMF meters measure low-frequency magnetic fields. Some measure electric fields. Some measure RF fields. Some combine all three. Many cheap consumer EMF meters are designed mainly for household 50/60 Hz fields from mains wiring and appliances, not for HF radio noise on 3.5 MHz, 7 MHz, 14 MHz, or VHF/UHF signals.
So the important question is not what the meter is called. The important question is:
What frequency range does it measure?
If the meter only measures 50/60 Hz or low-frequency magnetic fields, it will not help much with amateur radio interference. If it measures RF fields in kHz, MHz, or GHz, then it may be useful.
A simple comparison:
| Meter | What it measures | Common units | Amateur radio usefulness |
|---|---|---|---|
| Field strength meter | RF field strength | µV/m, dBµV/m, V/m | Useful |
| Gauss meter | Magnetic field | gauss, milligauss | Usually not useful for RF noise |
| Tesla meter | Magnetic field | tesla, µT, mT | Usually not useful for RF noise |
| EMF meter | Depends on model | V/m, µT, mG, mW/m² | Useful only if it covers RF |
For amateur radio noise hunting, a proper RF field strength meter is useful. A gauss or tesla meter is usually the wrong tool unless you are investigating low-frequency magnetic fields around power equipment.
Why a Gauss Meter Usually Does Not Help With Radio Interference
A gauss meter can be a good instrument in the right situation. For example, it can measure magnetic leakage around a transformer, magnetic fields near motors, or strong low-frequency fields near electrical equipment. But typical amateur radio interference is different.
Suppose an LED lamp is creating noise on 40 meters. The problem is not simply that the lamp has a strong magnetic field. The problem is usually fast switching inside the lamp’s power supply. That switching creates RF energy, which may be radiated through the air or conducted along the mains wiring. A gauss meter may show nothing useful, because it is not designed to analyze RF energy at 7 MHz.
The same applies to solar inverters, phone chargers, laptop power supplies, routers, and cheap switch-mode adapters. These devices may generate broadband RF noise. To find that kind of noise, you need RF-sensitive tools.
A gauss meter may still be useful in rare cases, such as audio hum pickup, magnetic coupling into nearby equipment, or checking strong fields near large electrical machinery. But for normal HF/VHF/UHF interference, it is not the first choice.
Start With Your Radio
Your own receiver is the first and most important measuring instrument. It is already sensitive to the exact interference that is bothering you.
Begin by recording the basic details:
- Band and frequency affected
- Mode used: AM, SSB, CW, FM, or digital
- S-meter reading
- Time of day when the noise appears
- Whether it is continuous or intermittent
- Whether it changes with weather
- Whether it changes when lights, chargers, appliances, or computers are switched on
- What the noise sounds like
- What it looks like on a waterfall, if available
The S-meter is not a laboratory instrument, but it is useful for comparison. If the noise is normally S2 and suddenly becomes S8 every evening, that is important. If it disappears when one appliance is unplugged, that is even more important.
One of the first tests is very simple:
- Tune to the noisy frequency.
- Disconnect the antenna.
- Connect a dummy load.
- Listen again.
If the noise disappears, it is probably entering through the antenna system. If the noise remains, it may be generated inside the radio, power supply, audio interface, computer, USB cable, or another connected device.
Use Battery Power to Isolate the Shack
A very useful test is to run the radio from a battery. Disconnect the mains power supply completely. If possible, disconnect accessories too: computer, tuner power supply, amplifier, external speaker, rotor controller, USB interface, and chargers.
Use only:
- Radio
- Battery
- Antenna
If the noise drops significantly when running from battery, the problem may be related to your station power supply or connected shack equipment. If the noise remains, it may still be local, but it is probably being received through the antenna.
Another strong diagnostic method is to turn off household circuit breakers one by one while listening to the noise. If the noise disappears when one breaker is switched off, you have found the circuit feeding the source. Then you can inspect devices on that circuit.
Do this carefully. Do not open electrical panels or touch wiring unless you are qualified. But switching breakers off and on from the panel can be a very effective and safe first-level test if done properly.
The Best Tools for Amateur Radio Noise Hunting
A field strength meter can help, especially if it is designed for RF. It can show whether the RF field is stronger near a certain device, cable, room, or outdoor location. However, simple field strength meters are often broadband and may respond to many signals at once. They may not tell you which frequency is causing the problem.
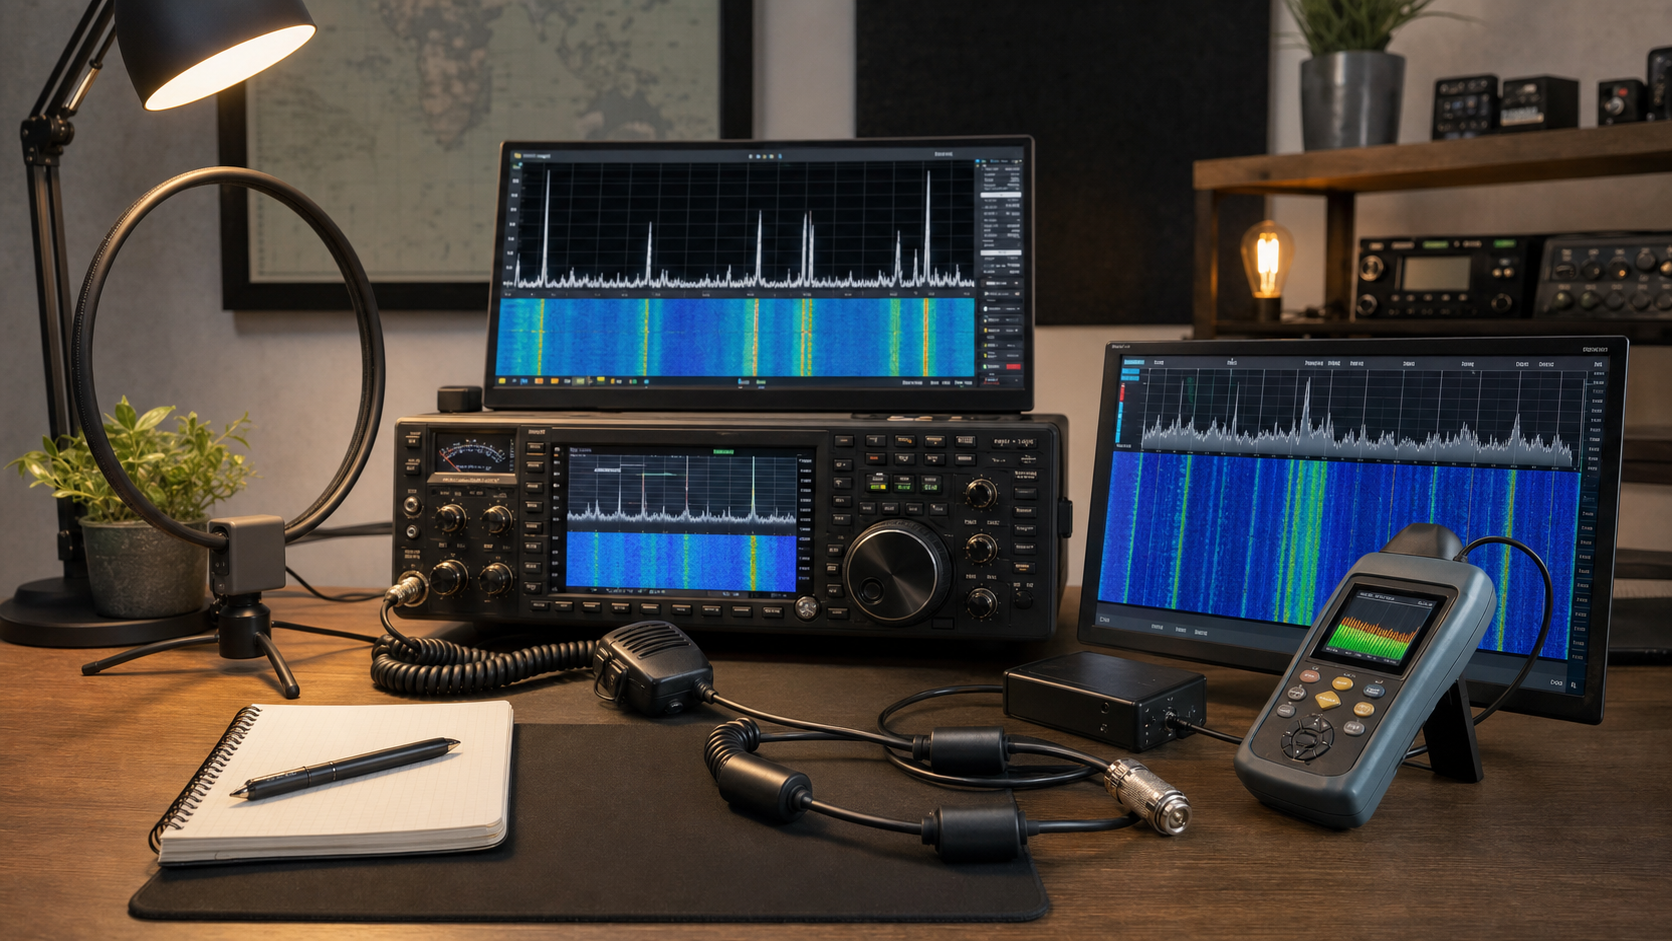
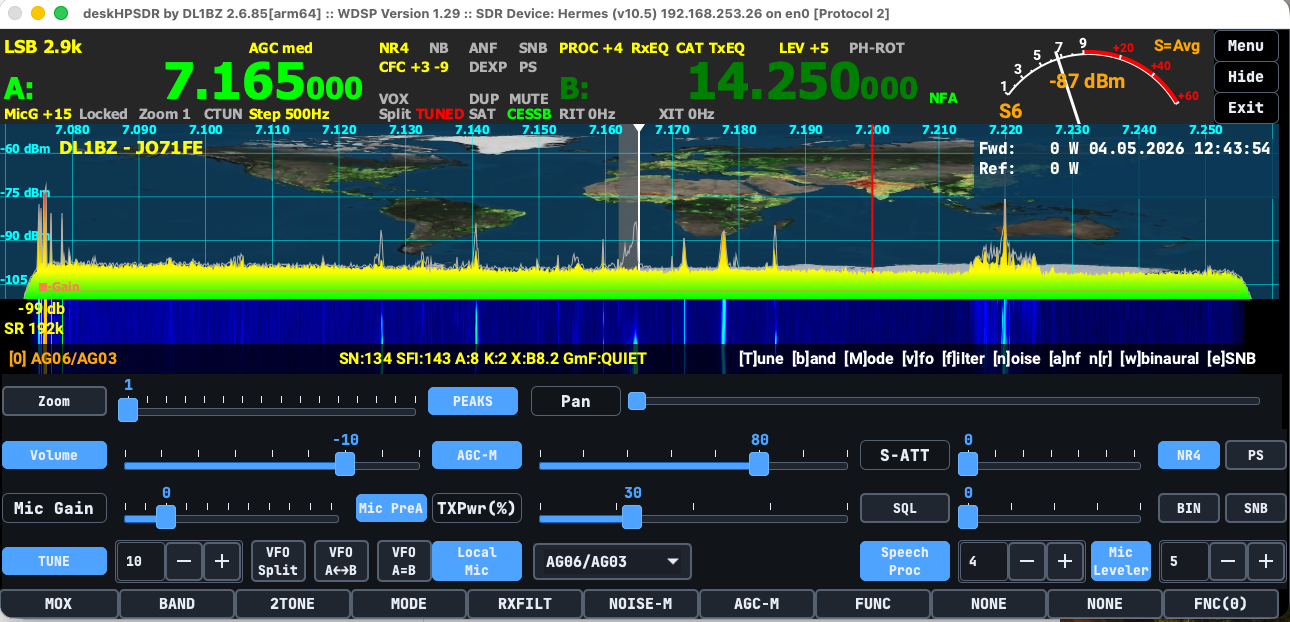
An SDR receiver is often more useful. With an SDR waterfall, you can see the noise pattern. Switching power supplies may create comb-like lines. Digital electronics may create wide blocks of noise. Electric fences may produce regular pulses. Power-line noise may appear as rough broadband hash.
A portable shortwave receiver is excellent for HF noise hunting. Walk around with it and listen. If it has a signal strength display, even better.
A small magnetic loop antenna is very useful for HF direction finding. A loop has a sharp null. Rotate the loop and look for the direction where the noise becomes weakest. That null can help point toward or away from the source.
For VHF and UHF, a handheld radio with a directional antenna is useful. A small Yagi or log-periodic antenna can help locate noise radiated from power lines, electronic equipment, or other RF sources.
A near-field probe connected to a spectrum analyzer or SDR is useful when checking electronic devices at close range. You can sniff around power supplies, circuit boards, cables, LED drivers, and computers.
A clamp-on RF current probe is useful for conducted noise. Many interference problems travel along cables before radiating. By clamping around power cords, coax shields, Ethernet cables, USB cables, or speaker wires, you can see whether RF noise is flowing on that cable.
Radiated Noise vs Conducted Noise
Noise can reach your receiver in more than one way.
Radiated noise travels through the air like a radio signal. Your antenna receives it. This is common with arcing power lines, noisy LED lamps, solar inverters, and electronic devices with poor shielding.
Conducted noise travels along wires. It may move through mains wiring, coax shields, USB cables, Ethernet cables, control cables, or DC power leads. Once it is on a cable, the cable may act like an antenna and radiate the noise.
This is why ferrite chokes sometimes work very well. They reduce common-mode RF current flowing on cables. But ferrites should be applied after some investigation, not randomly. If you identify the noisy cable first, your solution will be much more effective.
A Practical Step-by-Step Method
First, identify the band and frequency range. Is the noise only on one frequency, or across the whole band? Does it affect 80 meters, 40 meters, 20 meters, and 2 meters, or only one band?
Second, check whether the noise is external to the receiver. Use a dummy load. If the noise disappears, it is coming through the antenna path.
Third, run the station from battery. If the noise drops, investigate your power supply and connected equipment.
Fourth, turn off household breakers one at a time. If one circuit kills the noise, unplug devices on that circuit until the source is found.
Fifth, use a portable receiver, SDR, or field strength meter to search around the house. Move slowly. Check LED lights, chargers, routers, TVs, monitors, computers, solar equipment, battery chargers, and appliances.
Sixth, use direction finding. On HF, use a loop. On VHF/UHF, use a directional antenna. Take readings from more than one location.
Seventh, confirm the source. Unplug it, switch it off, move away from it, or temporarily add ferrites. If the noise changes dramatically, you have strong evidence.
Common Noise Sources for Amateur Radio Operators
The most common modern source is the switch-mode power supply. These are found in phone chargers, laptop adapters, routers, LED lights, TVs, monitors, CCTV systems, battery chargers, and many household devices. Cheap or failing supplies can be extremely noisy.
LED lights are another common offender. Some are clean, but others produce severe HF noise, especially when used with dimmers.
Solar power systems can be difficult sources because the wiring is long and the power levels are high. Inverters, optimizers, and DC cables can all radiate noise. Solar noise often follows daylight patterns.
Power-line noise is another major problem. It may sound like harsh buzzing, frying, or raspy crackling. It may change with rain, wind, or humidity. Loose hardware, cracked insulators, and arcing connections can generate strong broadband interference.
Computers and networking equipment can create noise through USB, HDMI, Ethernet, and power cables. Sometimes the device itself is not the only problem. The cables connected to it become antennas.
Measuring Correctly
For serious measurements, calibration matters. A basic S-meter reading is useful, but it is not exact. One radio’s S7 may not equal another radio’s S7. In theory, S-units are often treated as 6 dB steps, but many radios are not perfectly calibrated.
A field strength meter also depends on its antenna, bandwidth, calibration, and frequency range. A reading from a simple meter is usually best treated as relative, not absolute.
For amateur troubleshooting, relative measurements are often enough. If the noise drops from S9 to S4 after unplugging a charger, that is meaningful. If a ferrite choke reduces the noise by three S-units, that is useful. Just keep the test conditions the same: same frequency, same receiver, same bandwidth, same antenna, same location.
What Should an Amateur Radio Operator Buy?
If your goal is to hunt radio interference, do not buy a meter just because it says “EMF.” Check the specifications.
A good basic toolkit would be:
- Your station receiver
- Battery power for testing
- Dummy load
- Portable shortwave receiver or SDR
- Small loop antenna for HF
- Directional antenna for VHF/UHF
- Clip-on ferrites
- RF field strength meter or spectrum analyzer if budget allows
- Clamp-on RF current probe for cable noise work
A gauss meter or tesla meter is not useless, but it is usually not the tool you need for radio interference. It measures magnetic field strength, not necessarily the RF energy that is raising your receiver noise floor.
Conclusion
For amateur radio, measuring noise is not just about buying a meter and reading a number. It is about understanding the type of interference, how it reaches your receiver, and how it behaves over time.
A field strength meter is useful when it measures RF fields in the frequency range of interest. An EMF meter may be useful only if it covers RF, but many consumer EMF meters are mainly for low-frequency household fields. A gauss meter and tesla meter measure magnetic fields and are usually not the right tools for HF, VHF, or UHF interference hunting.
The best approach is methodical. Use your radio first. Compare antenna and dummy load. Run from battery. Turn off house circuits. Use a receiver, SDR, loop antenna, or directional antenna to find the source. Document what you hear, what you measure, and what changes.
Good noise hunting is part measurement, part observation, and part patience. Once you know whether the noise is radiated or conducted, local or external, broadband or narrowband, you can fix the real problem instead of guessing. That is what makes a good amateur radio operator more than just a station owner: you become someone who understands the invisible signals around you.


Post Comment