Unlocking Walkie-Talkie Potential: Programming Channels with Open Source Chirp Software on Ubuntu
Walkie-talkies have long been a staple communication tool for various industries, outdoor enthusiasts, and emergency responders. While traditional walkie-talkies come pre-programmed with a set of channels, customizing these channels to suit specific needs has often been a challenge. However, with the advent of open-source software like Chirp, programming walkie-talkie channels has become more accessible than ever. In this article, we’ll explore how to harness the power of Chirp on Ubuntu to tailor your walkie-talkie experience.
Understanding Chirp:
Chirp is an open-source, cross-platform application designed for programming amateur radios and other radio-based devices. It offers a user-friendly interface and supports a wide range of radio models, making it a versatile tool for radio enthusiasts and professionals alike. Chirp allows users to easily manage frequencies, channels, and other radio settings, empowering them to customize their devices according to specific requirements.
Getting Started:
- Install Chirp: Begin by installing Chirp on your Ubuntu system. You can either download the precompiled binary from the Chirp website or install it using the package manager.
- Connect Your Walkie-Talkie: Use a compatible USB programming cable to connect your walkie-talkie to your computer. Ensure that the cable is properly connected, and the walkie-talkie is powered on.
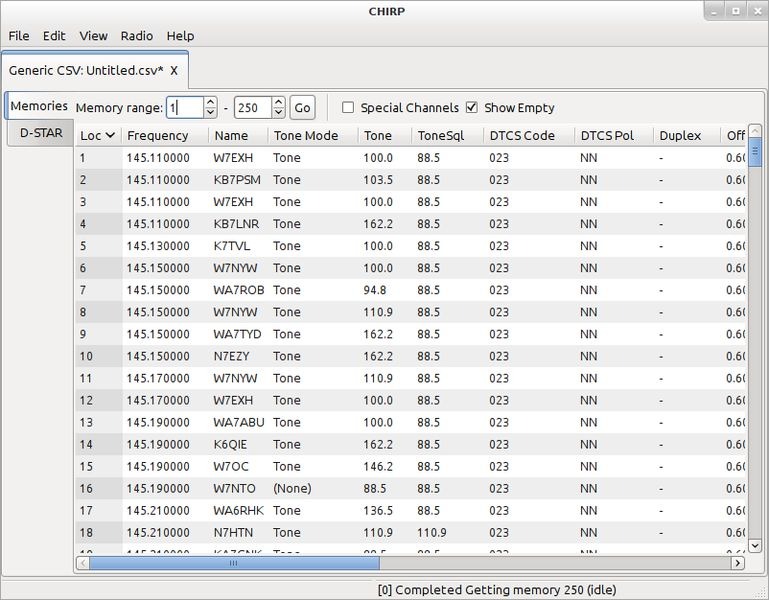
- Launch Chirp: Open Chirp on your Ubuntu system. The application should detect the connected radio automatically. If not, you may need to select the appropriate radio model from the supported list.
Programming Channels:
- Read from Radio: Before making any changes, it’s essential to read the existing configuration from your walkie-talkie. This allows Chirp to retrieve the current channel settings and frequencies.
- Modify Channels: Once the radio configuration is loaded, you can begin customizing the channels according to your preferences. Chirp provides an intuitive interface for adding, deleting, and editing channels. You can specify the frequency, tone settings, channel names, and other parameters as needed.
- Write to Radio: After making the desired changes, it’s time to write the new configuration back to your walkie-talkie. This process uploads the updated channel settings to the device, ensuring that it reflects the changes you’ve made in Chirp.
- Verify Settings: Once the programming process is complete, it’s a good practice to verify that the changes have been applied correctly. You can do this by checking the channel settings directly on the walkie-talkie or by reading the configuration back into Chirp.
By leveraging the power of open-source software like Chirp, programming walkie-talkie channels on Ubuntu has never been easier. To facilitate this process, ensure you have a compatible USB programming cable to establish a connection between your walkie-talkie and computer. Whether you’re a radio enthusiast looking to experiment with different frequencies or a professional needing to customize channels for specific applications, Chirp provides a user-friendly solution for managing radio configurations. With its intuitive interface and broad device support, Chirp unlocks the full potential of your walkie-talkie, empowering you to communicate with confidence in any setting.


Post Comment