9M2PJU
amateur radio
open source
9M2PJU, amateur radio, AMOLED, Arduino, band conditions, captive portal, DIY electronics, DX cluster, DX spots, DXSpider, ESP Web Tools, esp32, GPL, hamradio.my, heltec, LilyGO, LovyanGFX, M5Stack, M5StickC Plus, microcontroller, NTP, OLED, open source, platformio, portable operation, qrp, sota, Sunton CYD, T-Deck, T-Display-S3, T-Watch, telnet, TFT, UTC clock, Waveshare, Web Serial, wifi
9M2PJU
2 Comments
Build a Standalone ESP32 DX Cluster Client with 9M2PJU Firmware
There is a particular pleasure in a DX cluster that just sits there and works. You glance over at the desk, the screen is quietly scrolling fresh spots, and somewhere on the other side of the world a station you have been chasing for years is being called out by someone who can actually hear them. All you have to do is turn the dial.
For most of us, that moment requires a computer running a telnet client, a browser tab pointed at a web cluster, or a phone propped up against the coffee mug. It works, but it is not exactly a gadget. It is a window into someone else’s software, and it disappears the moment the laptop goes to sleep.
So I built a proper gadget. It is small, it is open source, and it flashes straight from your browser.
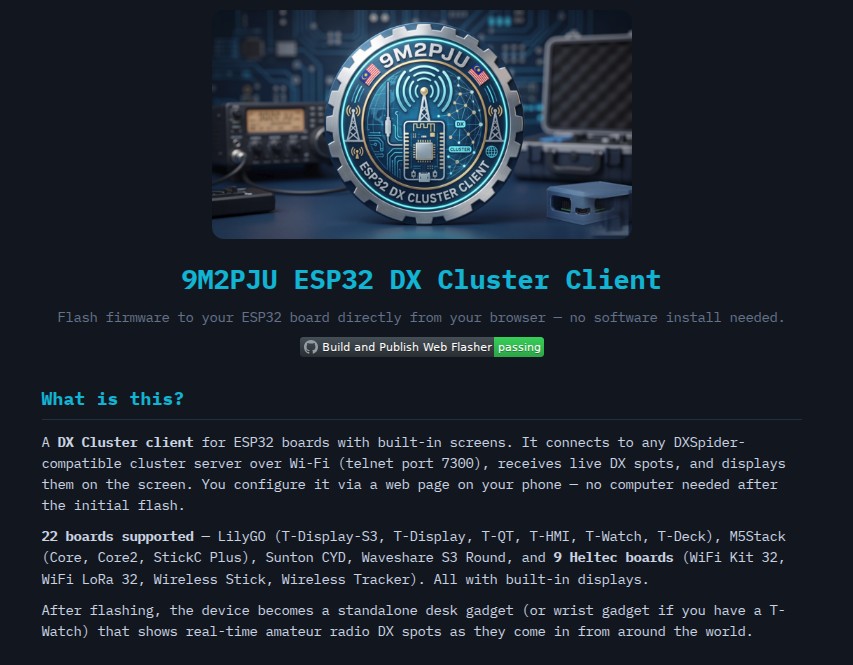
The project is 9M2PJU ESP32 DX Cluster Client, a single PlatformIO firmware that runs on 22 popular ESP32 boards with a built-in screen, connects to any DXSpider-compatible cluster over Wi-Fi, and shows live DX spots on the display. No computer, no telnet client, no software to install. You flash it from Chrome, configure it from your phone, and it sits on your desk (or on your wrist, if you have a T-Watch) doing the one job a DX cluster gadget should do: showing you what is being heard, right now, around the world.
Last updated: July 2026.
What It Is, in One Breath
The 9M2PJU ESP32 DX Cluster Client is a PlatformIO firmware for ESP32 boards that have a screen and Wi-Fi. On boot it joins your Wi-Fi, opens a telnet connection to a DX cluster server (default: 9m2pju.hamradio.my:7300, the 9M2PJU DXSpider Docker node), and renders the live spot stream on the display. You configure it once, through a captive-portal web page served from the ESP32 itself, and after that it is a standalone appliance.
It is the companion client to the 9M2PJU DXSpider Docker node, but it speaks the standard telnet DX cluster protocol on port 7300, so it works against any DXSpider, CC Cluster, or AR-Cluster server you point it at.
It is built and maintained by 9M2PJU, the same Malaysian amateur behind hamradio.my, and it is offered free for the hobby.
Why a Hardware DX Cluster Client?
A DX Cluster is a real-time network of servers that relay “spots”, short reports of rare or interesting amateur radio activity, to every connected operator. A spot looks like this:
DX de 9M2XYZ: 14.074 JA1ABC FT8, strong signal in Europe 1234Z
That single line tells you a station in Malaysia heard a Japanese station on 20 metres, the mode was FT8, the signal was strong in Europe, and the spot was posted at 12:34 UTC. Multiply that by hundreds of operators spotting simultaneously, and you have a live, planet-wide picture of which bands are open and which rare ones are coming through.
The conventional way to read that stream is a telnet client on a computer, or a web cluster page in a browser. Both work, but both tie up a general-purpose device for a job that is really just “show me a scrolling list of text and keep the clock in UTC.” An ESP32 with a screen does that job better, for less power, with no fan, no operating system, and no temptation to check your email.
The other advantage is field use. A battery-powered ESP32 with a screen, a T-Watch, an M5StickC Plus, a Heltec WiFi Kit 32, becomes a pocket DX cluster monitor you can carry to a SOTA activation, a field day, or a club night without dragging a laptop along. It just needs 2.4 GHz Wi-Fi.
A Tour of the Firmware
Key Features
- Browser-based Web Flasher, install firmware directly from Chrome or Edge via Web Serial. No PlatformIO, no Arduino IDE, no drivers to chase. Plug in USB, click a button, wait 30 seconds. Hosted at esp32dxcluster.hamradio.my.
- Built-in Web Admin UI, configure Wi-Fi, callsign, cluster server, and more from a captive portal on your phone. No source code editing, no USB connection needed after the first flash. Settings are stored in NVS (non-volatile storage) and survive reboots and firmware updates.
- 22 boards supported out of the box, LilyGO T-Display-S3, T-Display, T-QT, T-HMI, T-Watch 2020, T-Watch S3, T-Deck, M5Stack Core/Core2, M5StickC Plus, Sunton CYD, Waveshare S3 Round, and the T-Display-S3 AMOLED, plus 9 Heltec boards with OLED/TFT displays. See the supported boards table below.
- Adaptive UI, large panels (320 px and up) show a scrolling spot list with frequency, callsign, spotter, and comment. Small and round panels show a compact single-spot view with a connection ring. The header always shows “9M2PJU DX Cluster Client” and a UTC clock synced via NTP.
- Button command menu, press the BOOT button to open a menu of common DX cluster commands (
sh/dx,sh/wwv,sh/muf,sh/u,sh/c, and so on). Short press to cycle, long press to send. Response text is rendered on screen. No computer or telnet client needed. - Automatic reconnect for both Wi-Fi and telnet. If your Wi-Fi drops or the cluster server restarts, the device reconnects on its own.
- Band colour coding, spot frequencies are coloured by band for quick visual scanning of where the action is.
- Captive portal, when you connect to the device’s setup Wi-Fi, the configuration page pops up automatically on most phones. No need to type an IP address.
The 22 Supported Boards
One PlatformIO environment per board. Pick the one that matches your hardware.
Environment (-e) |
Board | Display | Chip | Resolution |
|---|---|---|---|---|
lilygo-tdisplay-s3 |
LilyGO T-Display-S3 | 1.9″ ST7789 (parallel) | ESP32-S3 | 320×170 |
lilygo-tdisplay-s3-amoled |
LilyGO T-Display-S3 AMOLED | 1.91″ RM67162 (QSPI) | ESP32-S3 | 536×240 |
lilygo-tdisplay |
LilyGO T-Display | 1.14″ ST7789 (SPI) | ESP32 | 240×135 |
lilygo-t-qt |
LilyGO T-QT | 0.8″ GC9A01 (SPI) | ESP32-S3 | 128×128 |
lilygo-t-hmi |
LilyGO T-HMI | 2.4″ ILI9341 (SPI) | ESP32-S3 | 320×240 |
m5stickc-plus |
M5Stack StickC Plus / Plus2 | 1.14″ ST7789 (SPI) | ESP32-PICO | 240×135 |
m5stack-core |
M5Stack Basic / Core / Fire | 2.0″ ILI9341 (SPI) | ESP32 | 320×240 |
m5stack-core2 |
M5Stack Core2 / CoreS3 | 2.0″ ILI9341 (SPI) | ESP32 | 320×240 |
sunton-2432s028 |
Sunton ESP32-2432S028R (CYD) | 2.8″ ILI9341 (SPI) | ESP32 | 320×240 |
waveshare-s3-round |
Waveshare ESP32-S3-Touch-LCD-1.28 | 1.28″ GC9A01 round (SPI) | ESP32-S3 | 240×240 |
lilygo-t-watch-2020 |
LilyGO T-Watch 2020 | 1.54″ ST7789 (SPI) | ESP32 | 240×240 |
lilygo-t-watch-s3 |
LilyGO T-Watch S3 | 1.54″ ST7789V3 (SPI) | ESP32-S3 | 240×240 |
lilygo-tdeck |
LilyGO T-Deck | 2.8″ ST7789 (SPI) | ESP32-S3 | 320×240 |
heltec-wifi-kit-32 |
Heltec WiFi Kit 32 | 0.96″ SSD1306 (I2C) | ESP32 | 128×64 |
heltec-wifi-kit-32-v2 |
Heltec WiFi Kit 32 V2 | 0.96″ SSD1306 (I2C) | ESP32 | 128×64 |
heltec-wifi-kit-32-v3 |
Heltec WiFi Kit 32 V3 | 0.96″ SSD1306 (I2C) | ESP32-S3 | 128×64 |
heltec-wifi-lora-32 |
Heltec WiFi LoRa 32 | 0.96″ SSD1306 (I2C) | ESP32 | 128×64 |
heltec-wifi-lora-32-v2 |
Heltec WiFi LoRa 32 V2 | 0.96″ SSD1306 (I2C) | ESP32 | 128×64 |
heltec-wifi-lora-32-v3 |
Heltec WiFi LoRa 32 V3 | 0.96″ SSD1306 (I2C) | ESP32-S3 | 128×64 |
heltec-wireless-stick |
Heltec Wireless Stick | 0.49″ SSD1306 (I2C) | ESP32 | 64×32 |
heltec-wireless-stick-lite |
Heltec Wireless Stick Lite | 0.49″ SSD1306 (I2C) | ESP32 | 64×32 |
heltec-wireless-tracker |
Heltec Wireless Tracker | 0.96″ ST7735 (SPI) | ESP32-S3 | 160×80 |
The reason one firmware covers all of them is LovyanGFX, a single display library that supports every controller this project targets, ST7789, ILI9341, GC9A01, RM67162, ST7789V3, SSD1306, ST7735, across SPI, 8-bit parallel, QSPI, and I2C buses, with one unified API. Without it, supporting 22 boards would mean maintaining 22 forked display drivers.
Flashing From the Browser
This is the feature I am proudest of, because it is the one that removes the biggest barrier for non-developers.
Open esp32dxcluster.hamradio.my in Chrome or Edge, plug in your ESP32 board over USB, click Connect, pick the serial port, and click Install. The page uses ESP Web Tools, which handles the Web Serial connection, flashing, and verification entirely in the browser. No PlatformIO install, no Arduino IDE, no driver hunt (on most modern OSes), no command line.
The one catch is browser support. Web Serial is a Chromium thing, so you need Chrome, Edge, Opera, or Brave. Firefox and Safari do not support it, and iOS does not expose Web Serial in any browser. The flasher page lays this out clearly before you start.
After flashing, the board reboots automatically. The screen shows “9M2PJU DX Cluster Client” and then “SETUP MODE”, and you move on to configuration.
Configuring From Your Phone
After flashing, the device boots into setup mode because no Wi-Fi is configured yet. It creates a Wi-Fi hotspot with a name like 9M2PJU-DXCluster-A1B2. The last four characters are unique to your device, so if you flash two of them they don’t collide.
- On your phone, open Wi-Fi settings and connect to that network. It is open, no password needed to join.
- A captive portal page should pop up automatically. If it doesn’t, open any browser and go to
http://192.168.4.1/. - Fill in the form: Wi-Fi SSID (tap “Scan for networks” to list what’s nearby), Wi-Fi password, your callsign, and the DX cluster server address and port.
- Tap Save & Reboot.
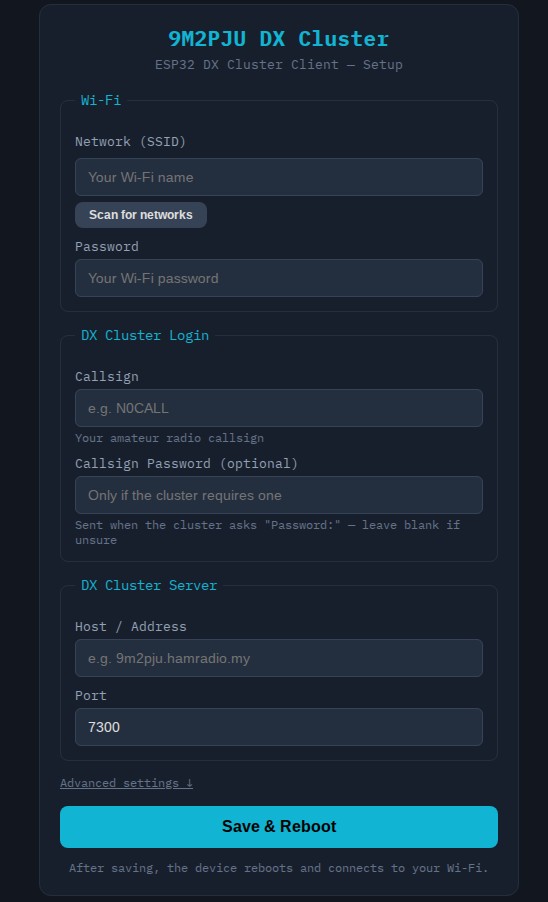
The device saves your settings to NVS, reboots, joins your Wi-Fi, opens the telnet connection to the cluster, and starts showing spots. You only do this once, settings persist across power cycles and firmware updates.
| Field | What to enter | Example |
|---|---|---|
| Wi-Fi SSID | Your Wi-Fi network name (tap “Scan” to list nearby) | MyHomeWiFi |
| Wi-Fi Password | Your Wi-Fi password | supersecret |
| Callsign | Your amateur radio callsign | 9M2PJU |
| Callsign Password | Only if the cluster requires one. Leave blank if unsure. | (leave blank) |
| DX Cluster Host | The cluster server hostname or IP | 9m2pju.hamradio.my |
| DX Cluster Port | The cluster telnet port | 7300 |
| Post-login command | Optional. A command sent after login (advanced). | set/dx |
A note on Wi-Fi: the ESP32 only supports 2.4 GHz (802.11 b/g/n). If your router is dual-band, make sure you pick the 2.4 GHz network name. Some ESP32 firmware builds also struggle with WPA3-only networks; if your router offers WPA2/WPA3 mixed mode, use that.
Using the Device
The Spot Display
Once configured, the display shows three things:
- Header bar, “9M2PJU DX Cluster Client” (truncated on small screens), a connection status dot (cyan = connected, orange = connecting), and the UTC clock synced via NTP.
- Spot list, a scrolling list of recent DX spots, newest first. Each spot shows the frequency (colour-coded by band), the DX callsign, the spotter callsign, and the comment.
- Setup screen, only when no Wi-Fi is configured or you forced setup mode. Shows the AP name and the
192.168.4.1address.
On wide panels (T-Display-S3, M5Stack Core, Sunton CYD, T-HMI), the spot list shows several rows at once. On small or round panels (T-QT, Waveshare round, T-Watch), the UI collapses to a compact single-spot view with a connection ring so it stays readable on a tiny screen.
The Button Command Menu
The BOOT button (GPIO 0, the same button used for flashing) opens a command menu in normal mode. You can send DX cluster commands without a computer or telnet client.
| Action | What happens |
|---|---|
| Short press (from spot view) | Opens the command menu |
| Short press (in menu) | Cycles to next command |
| Long press (hold ~1 second) | Sends the highlighted command |
| Short press (on response screen) | Closes response, returns to spots |
| 10 seconds of no input | Menu auto-closes |
Available commands:
| Command | Description |
|---|---|
sh/dx |
Show recent DX spots (refreshes the spot list) |
sh/dx 20 |
Show last 20 spots |
sh/dx/ft8 |
Show FT8 spots only |
sh/dx/cw |
Show CW spots only |
sh/dx/ssb |
Show SSB spots only |
sh/wwv |
Show solar / geomagnetic conditions |
sh/muf |
Show MUF (Maximum Usable Frequency) info |
sh/qtc |
Show QTC bulletins |
sh/ann |
Show recent announcements |
sh/u |
Show users connected to the cluster |
sh/c |
Show cluster links (partner nodes) |
sh/h |
Show help |
That covers most of what a DX chaser actually does at the cluster prompt, without ever opening a terminal.
Re-entering Setup Mode
If you change your Wi-Fi password, move to a new location, or want to point the device at a different cluster server, hold the BOOT button while pressing RESET (or while powering on). The device boots into setup mode regardless of saved configuration. Setup mode also activates automatically if the configured Wi-Fi network cannot be reached within 30 seconds.
A Few Honest Notes
The DX cluster protocol is plain telnet, which means unencrypted. This is standard for amateur radio DX clusters, the callsign is sent in plain text, and the callsign password (if your cluster requires one) is also sent in plain text. This is the same as any telnet DX cluster client. The web admin UI is local: it only travels between your phone and the ESP32 over the setup Wi-Fi, not over the internet.
Typical flash usage is 25-30% on ESP32-S3 (16 MB flash) and 65-75% on classic ESP32 (4 MB flash). RAM usage is about 15% (48 KB of 320 KB). There is plenty of room for future features.
The T-Watch 2020 has a small quirk: its display is powered by the AXP202 PMU, which the firmware initializes automatically over I2C at boot. If the battery is completely dead, plug in USB power and wait about 10 seconds for the PMU to bring the display up.
Why This Matters
The DX cluster is one of the oldest living institutions of amateur radio, predating the web by decades. It is also one of the most useful, a live, planet-wide picture of which bands are open and which rare ones are being heard, contributed by operators in real time.
By turning an ESP32 board you probably already have in a drawer into a standalone DX cluster appliance, flashable from a browser, configurable from a phone, running on a battery if your board has one, the project hopes to make the cluster as glanceable as a clock. The more people who build one, test one, and contribute back, the better the firmware gets for everyone.
So flash one. Put it on the desk. And the next time a band opens while you are not watching, the little screen will tell you.
73, and may your spots be rare.
Sources and Further Reading
- 9M2PJU ESP32 DX Cluster Client, web flasher and source: https://esp32dxcluster.hamradio.my/
- HamRadio.my DX Cluster Node: https://dx.hamradio.my/
- DXSpider (the cluster software): https://www.dxcluster.org/
- HamRadio.my, Amateur Radio Resources, Tools and Reviews: https://hamradio.my/
- About 9M2PJU, Malaysian Amateur Radio Operator: https://hamradio.my/about-9m2pju-malaysian-amateur-radio-operator/



2 comments