amateur radio
open source
Technology
APRS, Bluetooth programming, Brick Breaker, CHIRP TD-H9, codeplug, GMRS radio programming, GNSS, H9 Toolbox, ham radio handheld, ODmaster alternative, radio codeplug, repeater programming, TD-H9 APRS setup, TD-H9 backup, TD-H9 channel CSV, TD-H9 firmware, TD-H9 programming, TIDRADIO, TIDRADIO TD-H9, Web Bluetooth programmer
9M2PJU
0 Comments
H9 Toolbox: Program Your TIDRADIO TD-H9 in the Browser Over Bluetooth
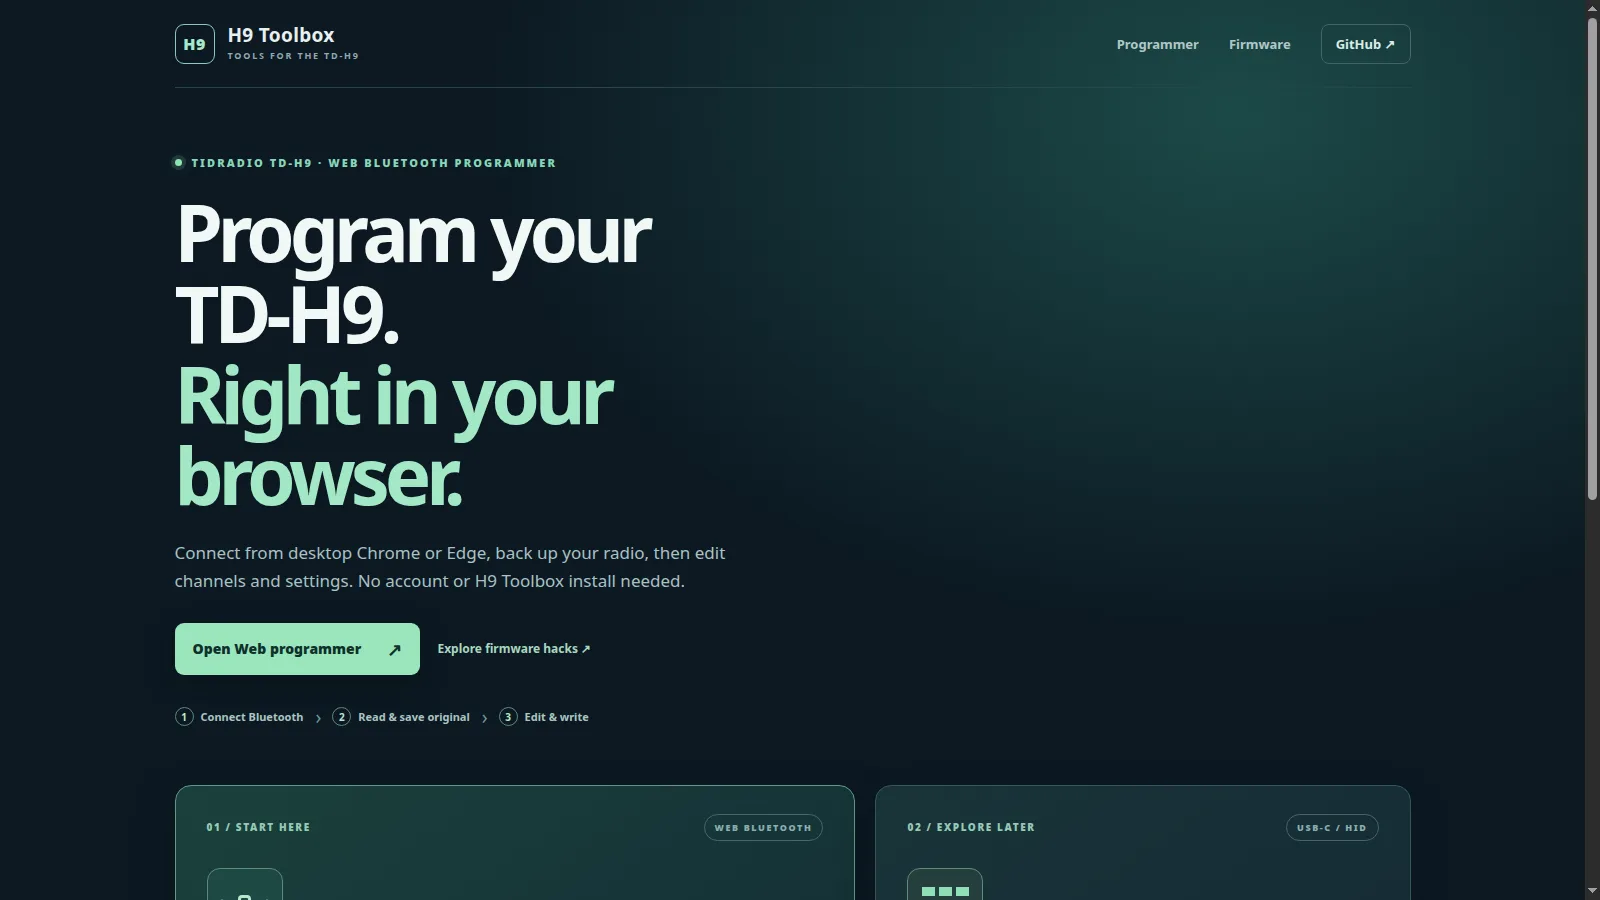
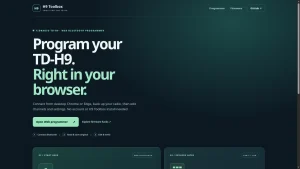
If you own a TIDRADIO TD-H9, you already know the feeling. The radio itself is a beast: 10 watts, GPS and APRS, SMS between handsets, a spectrum scope, and Bluetooth built in. Then programming day arrives, and you are hunting for a cable, creating yet another cloud account, or waiting for experimental CHIRP support to catch up. H9 Toolbox takes a different path. It is a small, buildless web page that talks to your TD-H9 directly over Web Bluetooth, edits channels and settings in Chrome or Edge, and writes only the blocks you changed. No account, no install, and your radio image never leaves your browser.
In this guide we tour the whole project: what the TD-H9 brings to the table, how the web programmer works step by step, how the channel CSV and JSON transfer formats fit real club workflows, what the stock-derived Brick Breaker firmware experiment proves, and where the honest limits sit. If you program one TD-H9 or a fleet of twenty, this is the fastest safe path from box to on-air.
TL;DR: H9 Toolbox is a free browser-based Bluetooth programmer for the TIDRADIO TD-H9 at h9toolbox.com. Read your radio, save an untouched .img backup, edit 199 channels plus APRS, GNSS, DTMF and display settings, then write back only changed 32-byte blocks with identity checks and read-back verification. CSV and JSON round-trips cover clubs and fleets, and a separate guided firmware page builds a stock-derived Brick Breaker image with a pinned HID recovery path. Use Chrome or Edge on a Bluetooth computer, keep both your .img and .fw backups, and you can program repeaters, APRS and travel codeplugs without an ODmaster account or a cable.
What H9 Toolbox Is
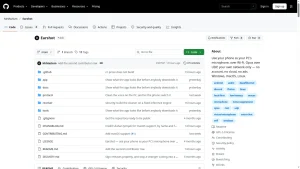
H9 Toolbox is an independent, browser-based Bluetooth programming tool for the TIDRADIO TD-H9 that reads, edits, backs up, and writes channel and settings memory directly from Chrome or Edge with no account and no installed software. Open h9toolbox.com, connect to the radio over Bluetooth, read the full 12,616-byte image, save an untouched .img backup, edit channels and mapped settings on screen, then write only the changed blocks back to the radio. The project is published as a static site with its source on GitHub, it is entirely AI generated under human direction, and radio images, channels, and settings are never sent to analytics. Only page views and site interactions are measured.
Three ideas define the design. First, the browser is the app: a buildless Web Bluetooth page that runs over HTTPS on desktop Chrome or Edge. Second, the backup comes before the edit: the workflow pushes you to read and save the original image before touching anything. Third, writes are surgical: only changed 32-byte blocks go over the air, each preceded by an identity and original-bytes check, followed by an ACK wait and a read-back of the same block.
Meet the Radio: TIDRADIO TD-H9 at a Glance
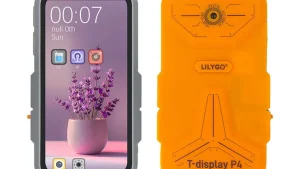
To understand why a tool like this matters, it helps to remember what the TD-H9 actually is. TIDRADIO positions the TD-H9 as its 10-watt flagship handheld: VHF and UHF transmit across 136 to 174 MHz, 220 to 259 MHz, 300 to 390 MHz, and 400 to 590 MHz depending on version, plus AM airband receive, FM broadcast receive from 87 to 108 MHz, and NOAA weather channels. The headline features for hams are GPS-based APRS tracking with live position sharing on maps like aprs.fi, radio-to-radio SMS texting between TD-H9 units, a spectrum analyzer view for checking busy versus clear channels, 128 MB of storage, a 2400 mAh battery, customizable channel names, dual customizable PTT buttons, and upgradeable firmware over USB-C.
Three versions cover licensing realities: Ham, GMRS, and Unlocked. All three share the same Bluetooth 5.1 BR, EDR, and BLE hardware, which pairs with headsets, wireless PTT buttons, wireless microphones, and, critically, programming apps. The classic programming route is the ODmaster web app, which needs an account and a cloud round trip, or a USB-C cable plus desktop software. H9 Toolbox adds a third route: direct Bluetooth programming from a laptop browser, with the radio image staying local.
Key TD-H9 specifications relevant to programming
- 10-watt handheld, VHF and UHF with AM airband, FM broadcast, and NOAA weather receive
- GPS plus APRS beaconing, SMS texting, spectrum scope, Morse emergency mode
- Bluetooth 5.1 for audio accessories and wireless programming
- 199 programmable memory channels with names, tones, power, and scan flags
- USB-C for charging, wired programming, and USB firmware update mode
- Ham, GMRS, and Unlocked version switch with global repeater compatibility
Why Browser Programming Matters for TD-H9 Owners
Every TD-H9 owner hits the same four programming options, and each has a catch.
Keypad programming works in the field but is slow and error prone for 199 channels with split tones. The ODmaster phone and web apps are official and polished, yet they require an account and send your codeplug through someone else’s cloud. Desktop CHIRP support for the TD-H9 has been tracked in the open, including CHIRP issue 12216, but BLE radios remain a special category with their own constraints, as the CHIRP BLE radio notes explain. A USB-C cable plus desktop software is reliable but means carrying the right cable and driver everywhere.
H9 Toolbox fills the gap between those options: the computer you already carry becomes the programmer, the browser you already have becomes the app, and the backup file you save becomes your undo button. For club programming nights, emergency communications go-kits, and travel codeplugs, that combination is hard to beat.
The Web Bluetooth Programmer: Start to Finish
The core of the project lives at h9toolbox.com/programmer. The page is organized as five numbered sections that mirror the safe order of operations. You cannot sensibly skip ahead, because each step feeds the next: connect, read and back up, edit channels, edit settings, then write.
1. Connect to your TD-H9
H9 Toolbox uses the Web Bluetooth API, which is why the browser requirement is strict: desktop Chrome or Edge over HTTPS. Turn on the radio Bluetooth programming mode, click Connect Bluetooth, and pick the TD-H9 from the browser device list. The header pill flips from Disconnected to connected, and the Activity panel starts narrating each step.
Under Bluetooth options you can override the service UUID if another H9 unit uses a nonstandard service. The tested TD-H9 advertises FF00, with writes on FF02 and notifications on FF01. That pair is the default browser profile, and the tool keeps manual options for unusual firmware.
- Requirement: desktop Chrome or Edge, HTTPS, computer with Bluetooth
- No account, no install, no cloud upload of radio data
- Data path stays local between browser and radio
2. Read and back up before touching anything
Click Read from radio to pull the complete image into browser memory: an 8-byte TD-H9 mode identity plus 0x3140 memory bytes, 12,608 bytes of radio memory for 12,616 bytes total. The on-page guidance is blunt and correct: save an untouched backup before editing, especially on a radio or firmware version you have not used with the tool before.
Three file formats matter here, and confusing them is the most common beginner mistake. The .img backup is the full fidelity snapshot you restore from. The readable JSON export carries populated channels plus named settings for transfer and review, but no raw memory blocks. The lossless archive JSON carries the complete original image as 394 hex memory blocks and can reconstitute a session without a separate .img. You can also open a full .img or an H9 Toolbox JSON from disk to inspect or stage edits without a radio attached, though a config JSON needs a radio read or .img loaded first.
- Save original .img: the undo button, keep it forever
- Download config JSON: readable channels plus named settings for transfer
- Download archive JSON: lossless, includes all raw hex blocks
- Download working .img: your currently edited image for other software
In November 2026 testing documented on the project, two complete Normal-mode reads over Web Bluetooth returned byte-identical 12,616-byte backups, channel 1 decoded as 2M-CALL on 146.520 MHz simplex matching the radio display, and a live channel write reported success. Extended setting writes had not yet been checked on hardware at that point, so the backup-first rule is not theater.
3. Edit channels 1 to 199
The channel editor covers channels 1 to 199 with direct Create and Remove buttons. Each entry carries RX and TX frequency, name, offset direction, FM or AM mode with wide or narrow bandwidth, separate TX and RX CTCSS or DCS tones with polarity, transmit power, scan inclusion, channel enablement, PTT ID, busy lockout, hopping RX, and scramble code.
Two quality-of-life behaviors stand out. Changing RX also updates TX for simplex and common US repeater pairs, with suggested offsets of minus 600 kHz for 145.20 to 145.50 and 146.61 to 146.97 MHz outputs, plus 600 kHz for 147.00 to 147.39 MHz outputs, and minus 1.6 MHz for 223.85 to 224.98 MHz outputs. On 70 cm the tool leaves the plus or minus 5 MHz choice to you because direction varies locally. Existing custom splits follow RX changes, while a manually entered TX stays put until you pick Use suggested TX. The defaults cite the ARRL band plan and repeater offset guidance, with individual repeater listings taking precedence.
4. Edit mapped radio, Bluetooth, GNSS, and APRS settings
The settings editor maps documented behavior across radio basics, VFO and scan, display and buttons, Bluetooth, SMS and Morse, DTMF controls, GNSS, and APRS identity, beacon, relay, and routing. Unknown values and unrelated bytes are preserved. Fixed GNSS coordinates are shown but not edited, stored DTMF codes and FM broadcast presets stay in the backup untouched, and undocumented firmware bytes are left alone.
The APRS warning deserves repeating: changing APRS beacon or relay options can cause transmissions, so review those values before writing. Morse state maps to byte 0x302A, where the newer image showed Morse on at 12 WPM and 700 Hz, while an earlier 0xFF control byte means Off. Key type, power, and RX threshold in the following byte cannot be edited by this tool and stay uninitialized.
5. Write only what changed
When you are ready, tick the confirmation that you reviewed channels and settings, then click Write changed blocks. Only changed 32-byte blocks are sent. Before each block, the app checks that the radio still matches the original image, then sends a W command with 16-bit address, length, payload, and a sum-of-payload checksum, waits for ACK, and reads the block back for verification. Clone reads use 32-byte blocks, tolerating both the older 36-byte BLE replies without checksum and the newer 37-byte replies with checksum seen on firmware 1.0.38.
Channel CSV and Portable JSON: the Fleet Workflow
For a single radio, on-screen editing is enough. For a club, an emergency team, or a family with four TD-H9 units, the file transfer formats are the real productivity feature.
Export channels CSV saves populated channels and every editable channel option in a spreadsheet friendly file, without radio settings or raw memory blocks. Import merges by channel number unless you tick Replace all channels, which also clears occupied slots missing from the file after a confirmation step. To clear one channel, set its action column to clear. Older channel JSON exports still import. Booleans accept true or false, yes or no, on or off, or 1 or 0. Tone types are off, ctcss, dcs, or raw, with raw tones preserved only on their original channel. Channel names starting with spreadsheet formula characters get a leading apostrophe in the CSV, stripped again on round trip. Keep radio_mode equal to the loaded image mode.
The readable config JSON is the review friendly format: pretty printed channels plus named settings with display labels for option values and numbers for numeric fields. To use it on another computer, first read the destination radio or open its .img, then open the JSON. Listed channels and settings merge into that image, unmentioned channels stay, and an explicit clear entry removes a channel. The lossless archive JSON is the full fidelity transfer: all 394 hex blocks, importable without a separate .img. Both JSON variants can contain callsigns and relay passwords, and the archive contains every other image byte too. So think before sharing them in a public group chat.
Know Which Image You Have: .img Versus .fw
H9 Toolbox is explicit about a distinction that bites newcomers: the Bluetooth programmer saves a channel and settings .img, while firmware flashing uses a .fw package plus a separate main-flash backup. Keep both if you use both tools. They are not interchangeable.
The .img is your programming undo button. The .fw package and main-flash backup are your firmware recovery path. Label them with radio serial, firmware version, and date, and store them in two places. A TDH9-2026-11-07-stock-v1038.img name will save you real grief six months from now.
Firmware Side: Brick Breaker, Guided Installer, and a Way Back
The second half of the project lives at h9toolbox.com/firmware with build tooling in firmware-research on GitHub. The headline experiment is Brick Breaker: a stock-derived image that keeps the normal channel screen and launches the game when you hold Back. Only five sectors change, short Back taps keep their stock behavior, and on the trial radio the web programmer could still read and write channels with Brick Breaker installed. That combination is confirmed on one radio only, and other radios and CHIRP remain untested with this image.
The process is deliberately careful. A Python 3.11 or newer one-liner downloads and verifies the pinned Type-C v1.0.38 stock package, patches it with the tested game, creates a fresh backup, and asks before writing. You enter USB update mode with the 8 key. MacOS uses a separate experimental HID install path. The tool saves the radio main-flash backup before the BR23 write and includes a pinned HID restore command, with recovery requiring the backup from your radio and PTT plus 2 HID mode with a solid green top LED. Run with build first to download, build, and verify the package without touching a radio.
Honest framing matters here. Brick Breaker was tested on one TD-H9, and the macOS HID installer has offline tests but no Mac hardware validation. This is research tooling with a recovery path, not a mass market firmware line. Read the install and recovery guide end to end before you start.
H9 Toolbox Versus the Alternatives
Every programming method has a place. Here is how they compare for TD-H9 work:
| Task | H9 Toolbox web programmer | ODmaster app | CHIRP desktop | Front panel keypad |
|---|---|---|---|---|
| Account needed | None | Yes, ODmaster login | None | None |
| Install needed | None, Chrome or Edge page | Phone app or web app | CHIRP plus cable and driver | None |
| Connection | Bluetooth, direct to radio | Bluetooth via cloud account | USB cable, BLE support varies | Built in |
| Full .img backup | Yes, one click plus archive JSON | Profile based | Image based per driver | No |
| Channel CSV round trip | Yes, merge or replace with confirm | Export options vary | Yes, mature CSV workflow | No |
| Readable JSON transfer | Yes, config plus lossless archive | No equivalent | No equivalent | No |
| Surgical block writes with read-back | Yes, changed 32-byte blocks only | Handled internally | Driver dependent | Immediate per keypress |
| APRS, GNSS, DTMF, display settings | Mapped settings with preservation | Full official menus | Depends on driver coverage | Menu by menu |
| Firmware experiments | Separate guided Brick Breaker flow | Official updates | Not a firmware tool | Not applicable |
| Offline behavior | Radio data stays local, page needs HTTPS | Needs account and network | Fully offline | Fully offline |
| Best for | Laptop programming nights, travel codeplugs, fleets | Official phone-first workflow | Unified multi-radio shacks | Field tweaks of one channel |
The table is not a ranking. Official ODmaster remains the supported path for warranty sensitive updates, CHIRP remains the multi-radio standard for mixed fleets, and the keypad remains the only tool that works with dead laptop batteries. H9 Toolbox wins on speed and transparency for TD-H9 specific work: no account, visible backups, spreadsheet friendly channels, and writes you can audit block by block.
Practical Workflows That Work on Day One
New owner, first hour. Charge the radio, install the stock antenna, read the radio with H9 Toolbox, save the untouched .img with serial and firmware version in the filename, then confirm channel 1 and a settings page against the radio display. Only then add your local repeater pair, set power and tones, and write. If anything looks odd, your backup restores the morning.
Repeater trip packing. Build the destination repeater list as a CSV at home: 2 m and 70 cm pairs, tones, offsets, scan flags. On arrival, read the travel radio, import the CSV with merge, review the list, and write. Keep the home .img and the trip .img as separate files so the return trip is one restore.
Club fleet night. One volunteer builds the master channel CSV and a reference config JSON, every radio gets read and backed up first with owner name in the filename, then the same CSV merges into each image. The lossless archive JSON covers the loaner laptop case where no .img is on disk. Callsigns and relay passwords travel in these files, so distribute them privately, not in a public channel.
APRS setup afternoon. Configure identity, beacon, relay, and routing on one radio, verify beacons on aprs.fi, export the config JSON, then apply it radio by radio with per-unit callsign and SSID corrected before each write. Review beacon settings every time, because these are the settings that transmit.
Honest Limits and Safety Rules
No tool review is complete without the limits, and this project states its own plainly. The web programmer needs desktop Chrome or Edge with Bluetooth over HTTPS, so iPhone Safari is out and some Linux Bluetooth stacks need coaxing. Only documented settings are mapped, with fixed GNSS coordinates, stored DTMF codes, FM presets, and undocumented firmware bytes preserved rather than edited. Morse key type, power, and RX threshold cannot be edited. APRS beacon and relay edits can transmit, so review before writing.
On firmware, the Brick Breaker image is a single-radio trial with no Mac hardware validation of the HID installer, and cross-radio plus CHIRP compatibility is untested. Keep both backups, keep the recovery guide printed or saved offline, and treat firmware experiments as weekend projects, not pre-deployment Friday changes. These are reasonable research limits, and the project earns trust by printing them instead of burying them.
Safety checklist before every write
- Read the radio fresh and save the untouched .img with serial, version, and date
- Confirm at least channel 1 and one settings page against the radio display
- Review APRS beacon, relay, power, and TX frequency edits line by line
- Confirm only intended blocks are listed as changed before writing
- Keep the .img and, if you flash firmware, the separate .fw plus main-flash backup
Getting Started in Ten Minutes
- Open h9toolbox.com in desktop Chrome or Edge on a Bluetooth computer.
- Open the programmer page and enable Bluetooth programming mode on the TD-H9.
- Connect, read the radio, and save the untouched .img plus a lossless archive JSON.
- Edit a single test channel, write changed blocks, and confirm on the radio display.
- Import your repeater CSV or a trusted config JSON, review, and write.
- Explore the firmware page and the GitHub source only after programming feels routine.
Why TD-H9 Owners Should Bookmark This
The TD-H9 is the rare handheld that is simultaneously a 10-watt FM workhorse, a GPS APRS tracker, an SMS messenger, a spectrum scope, and a Bluetooth accessory hub. That breadth makes programming friction hurt more than on a simple analog handheld. H9 Toolbox removes the two biggest frictions, accounts and cables, while adding the two most valuable habits, automatic backups and auditable writes. The CSV and JSON formats respect how clubs and emergency teams actually work, the protocol notes respect how developers actually debug, and the firmware research respects how experimenters actually learn: with a verified stock package, a guided installer, and a pinned recovery command.
If you own one TD-H9, bookmark the programmer for repeater season. If you maintain a fleet, standardize the CSV columns and backup filenames now. Either way, read first, save the original, and let the browser do the cable work.
Sources and Further Reading
- H9 Toolbox home
- H9 Toolbox web Bluetooth programmer
- H9 Toolbox firmware and recovery
- H9 Toolbox source on GitHub
- TIDRADIO TD-H9 official product page
- ODmaster web app login
- ARRL band plan
- CHIRP TD-H9 issue and test module
- CHIRP BLE radio notes
- Web Bluetooth API on MDN
- aprs.fi live APRS map
73 de 9M2PJU.

Post Comment