LilyGO T-Display P4: ESP32-P4 Handheld with AMOLED Touch, LoRa, GPS and Camera
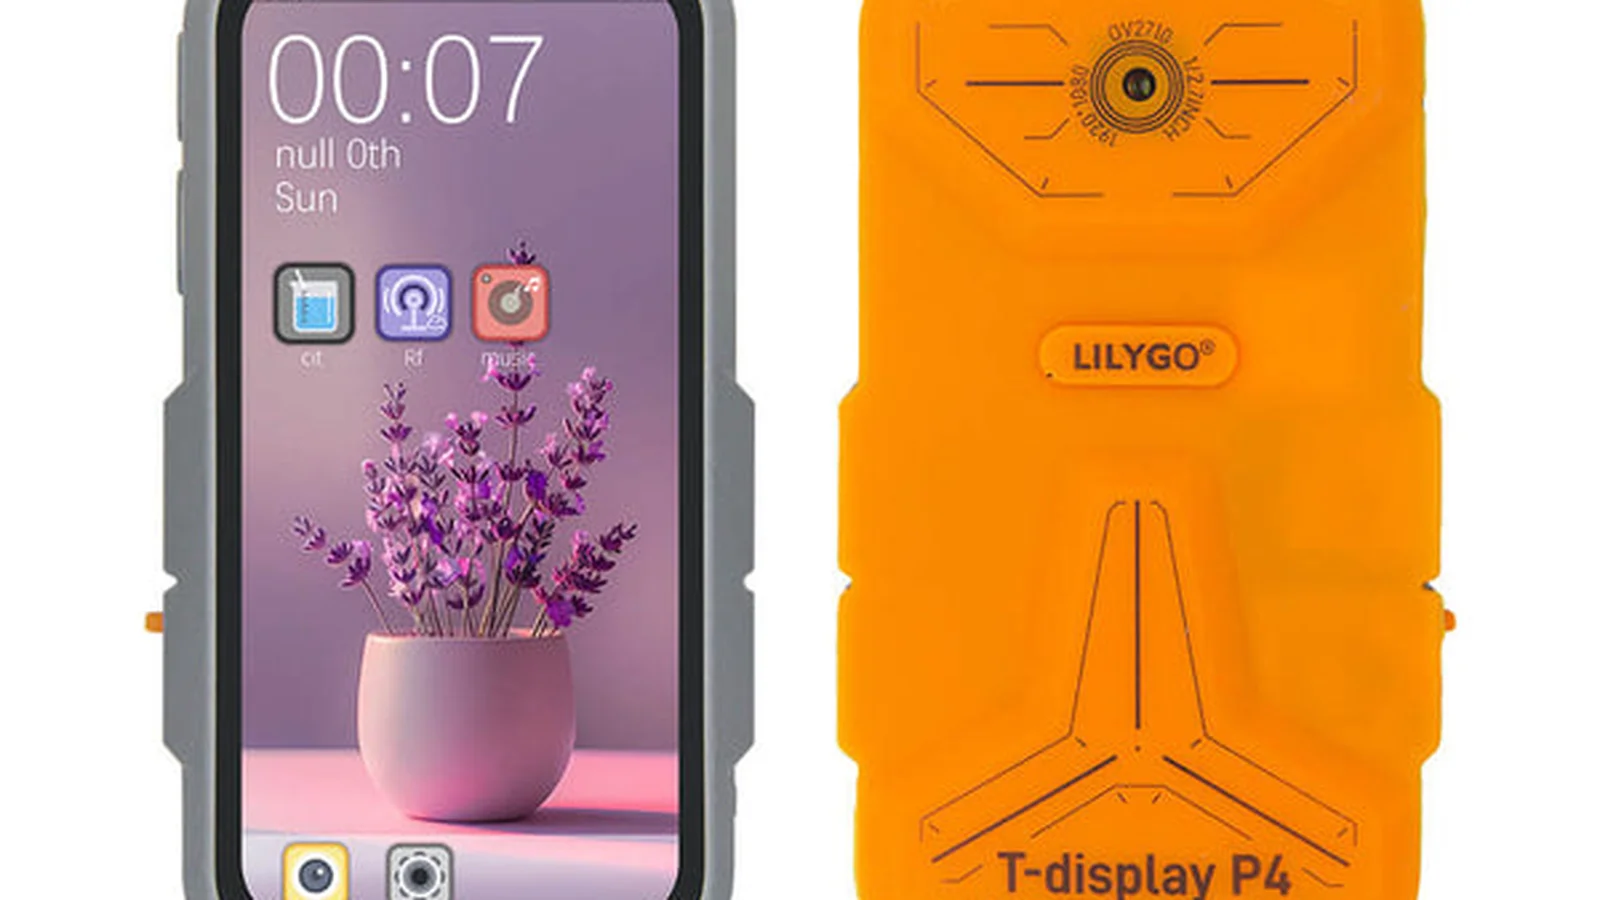
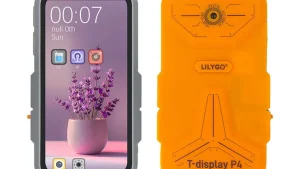
The LilyGO T-Display P4 is a handheld ESP32-P4 development board with a 4.1 inch AMOLED or 4.05 inch TFT capacitive touch display, ESP32-C6 WiFi 6 coprocessor, SX1262 LoRa radio, L76K GPS, 2MP camera, speaker and microphone, IMU, Ethernet and SD storage in a 63 x 109 x 22 mm pocket computer. Check price and stock via this buy link.
TL;DR: The LilyGO T-Display P4 pairs an ESP32-P4 dual core 360 MHz RISC-V processor with 16 MB flash and 32 MB PSRAM, an ESP32-C6 WiFi 6 plus Bluetooth 5 coprocessor, SX1262 or LR2021 LoRa in 400 to 520 or 830 to 945 MHz, L76K GPS, OV2710 2MP MIPI camera, ES8311 audio with speaker and mic, 9 axis IMU, BQ27220 fuel gauge, Ethernet PHY, SD slot and a 4.1 inch 568 x 1232 AMOLED or 4.05 inch 540 x 1168 TFT touch screen. It lists at $119.30 on the official store, supports ESP-IDF with open GPL-3.0 firmware, and takes an optional QWERTY keyboard with CC1101 plus NRF24L01 plus NFC. Buy it here: [buy the T-Display P4](https://s.click.aliexpress.com/e/_c4l3H86T).
What the LilyGO T-Display P4 Is
The LilyGO T-Display P4 is a pocket sized ESP32-P4 handheld computer with a high resolution MIPI touch display, dual chip WiFi architecture, LoRa mesh radio, GPS, camera, audio and motion sensors, built for portable ham radio, Meshtastic style mesh, field instruments and custom UI projects.
It looks and feels like a rugged smartphone, and that is the point. Instead of wiring a bare module to a separate screen, radio and GPS on a bench, you get one 63 x 109 x 22 mm device with everything mounted, charged over USB-C, and programmable through ESP-IDF. The official product page offers two display assemblies: the flagship 4.1 inch AMOLED with rear camera and the 4.05 inch TFT with punch hole under screen camera. Radio options cover SX1262 or LR2021 in 400 to 520 MHz or 830 to 945 MHz, so buyers must pick the band that matches their region. If you already know which version you want, use this buy link to check current stock and price.
LilyGO lists it at $119.30. For a device that replaces a devkit plus display plus LoRa module plus GPS plus audio plus IMU plus camera plus charger plus gauge, that price reads as fair rather than cheap. You pay for integration, not just silicon.
Why Two Chips: ESP32-P4 plus ESP32-C6
Most LilyGO boards use one chip for everything. The P4 splits the job:
- ESP32-P4 main processor: RISC-V dual core at 360 MHz plus a 40 MHz low power core, 16 MB flash, 32 MB PSRAM. It runs your firmware, drives the MIPI-DSI display, handles LoRa over SPI, GPS over UART, Ethernet over RMII, touch over I2C, audio over I2S and the camera over MIPI-CSI. Hardware blocks include JPEG codec, ISP, PPA pixel accelerator and H264 encoder, which is why this board can hold full frame camera images and fluid LVGL interfaces in memory without squeezing code.
- ESP32-C6 coprocessor: 2.4 GHz WiFi 6 (802.11ax) plus Bluetooth 5 LE, connected over SDIO. It owns wireless so the P4 stays free for compute. The M-Core P4 wiki notes the practical limit honestly: on current firmware the C6 side broadcasts a WiFi AP and doesn’t serve app HTTP itself, while web features run over Ethernet through the P4. Expect this split to matter when you plan features: put UI and radio logic on the P4, treat the C6 as the WiFi and Bluetooth pipe.
Firmware images aren’t interchangeable between chips. The GitHub repo hammers this point: select ESP32-P4 for main firmware and ESP32-C6 for coprocessor firmware, or you’ll flash the wrong target. The supported framework is ESP-IDF version 5.5.4 or newer, with Arduino, PlatformIO and MicroPython paths documented in the LilyGO wiki.
Display, Touch, Audio, Camera and Sensors
The screen is the reason to buy this board over a headless LoRa node:
- AMOLED version: 4.1 inch, 568 x 1232, RM69A10 driver with GT9895 touch, rear OV2710 camera. Deeper blacks, punchier colors, better sunlight contrast than TFT.
- TFT version: 4.05 inch, 540 x 1168, HI8561 driver, punch hole under screen camera. Slightly smaller and cheaper to drive, still sharp for maps and text.
- Both are 10 point capacitive touch over MIPI-DSI plus I2C, so buttons, keyboards, maps and lists feel like a phone UI rather than a TFT_eSPI demo.
Around the screen sits a full sensor set:
- Audio: ES8311 codec plus NS4150B amplifier with electret microphone and I2S speaker output. Good for voice prompts, notification tones, mesh voice experiments and AllStar style side uses.
- Camera: OV2710 2MP MIPI-CSI, 1080p at 30 fps or 720p at 60 fps. Useful for site photos, SSTV style experiments, scan to map notes and time stamped field logs.
- Motion: ICM20948 9 axis IMU with motion tracking plus DMP. Compass heading, tilt, step and shake gestures fall out naturally.
- Haptics: AW86224 linear vibration motor over I2C. Message alerts you can feel in a backpack.
- Time: PCF8563 RTC over I2C keeps wall time across sleeps when GPS is off.
- Power: LGS4056H charger with battery NTC plus BQ27220 I2C fuel gauge reporting voltage, current, capacity and temperature. Calibrate by setting design capacity to 1000 mAh in firmware, then run a full charge to shutdown to full charge cycle.
- Expansion: XL9535 16 bit GPIO expander, microSD slot, IP101GRI 10/100 Ethernet PHY over RMII, dual USB-C.
Practical note from the docs: the RST button resets the ESP32-P4 only, not whole board power. Some peripherals held by the XL9535 expander won’t re-enumerate until a real power cycle. If a sensor vanishes after RST, power cycle before blaming firmware.
Radios and Navigation: LoRa, GPS, Ethernet and the Keyboard Deck
The radio fit is what makes this board interesting to hams:
- LoRa: SX1262 or LR2021 over SPI, up to +22 dBm with sensitivity down near -148 dBm. The onboard HPD16A module covers the two standard ISM splits: 400 to 520 MHz and 830 to 945 MHz. Pick 433 or 868/915 to match your country plan. An SKY13453 RF switch selects internal versus external antenna under XL9535 IO1 control, with MMCX1 as the external connector. MMCX2 is unconnected, so don’t attach an antenna there. Always fit a suitable antenna to MMCX1 before enabling external path or transmitting, or you risk the RF stage.
- GPS: L76K over UART with roughly 1 second hot start. Position for map views, Maidenhead grids, APRS beacons, SOTA and POTA logging and speed or altitude overlays.
- Ethernet: IP101GRI PHY with RJ45 over RMII. Wired backhaul for dashboards, NTP time, MQTT, Winlink style gateways and bench flashing when WiFi misbehaves.
- C6 wireless: WiFi 6 plus Bluetooth 5 LE through the coprocessor for provisioning, phone tethering, BLE sensors and future Zigbee or Thread work.
The optional T-Display P4 keyboard turns the handheld into a console. It adds a TCA8418 keyboard controller, SY7200A backlight driver, XL9555 IO expansion and a T-MixRF deck with CC1101 sub GHz plus NRF24L01 2.4 GHz plus ST25R3916 NFC for reading, writing and emulation. That stack covers 433/868/915 experimentation, wireless mouse and keyboard sniffing ranges, RC link checks and NFC tags in one pocket device. Battery safety note from the repo: the keyboard holds a 21700 cell and its power switch must go OFF when idle, or the cell can sink into low voltage protection and need an external lithium charger with recovery mode to wake up. Never bypass the protection board, and retire swollen or leaking cells.
Ports, Power and the Two USB-C Trap
There are two USB-C ports and they aren’t equal:
- Right side P4.U: data, flashing, serial terminal for the ESP32-P4. Use this for
idf.py flash monitorand log viewing. In your terminal program turn off RTS and hardware flow control, because the RTS line can hold the P4 in reset and make the board look dead. - Left side USB-C: charging and power only, 5V at 500 mA. It won’t flash firmware.
Charging runs through the LGS4056H at modest current, so a big pack takes a while. That 500 mA ceiling is fine for overnight bench charging and keeps heat down inside the sealed case, but don’t expect fast charge behavior. For field days, charge fully the night before and treat the gauge as advisory until you complete one calibration cycle.
Firmware, Examples and Flashing Without Tears
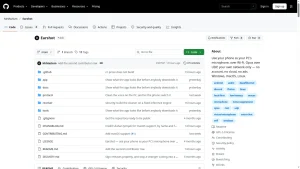
The open source story is strong. The T-Display-P4 GitHub repo is GPL-3.0 with about 70 stars, 19 forks and roughly 492 commits at write time, holding ESP-IDF examples, prebuilt LilygoBox factory firmware, Xiaozhi voice assistant firmware, Edge Agent firmware, schematics for both display assemblies, keyboard and battery boards, PCB CAD, datasheets and a power consumption test log. Libraries lean on LVGL 8.3.9, Arduino_GFX, TFT_eSPI, XPowersLib, SensorLib and TinyGPSPlus.
Standard ESP-IDF flow:
git clone --recursive https://github.com/Xinyuan-LilyGO/T-Display-P4.git
idf.py set-target esp32p4
idf.py menuconfig
idf.py build
idf.py flash monitor
Pick the example in menuconfig first. Good starting points are lilygobox-espidf for the factory app, main/examples for board specific demos and main/keyboard_examples for the expansion deck. Prebuilt binaries flash at address 0x0 as merged images through the Espressif online flashing platform.
The C6 coprocessor needs its own flow and its own UART. Steps in order: flash the [coprocessor_download_mode] prep build to the P4, wait for the serial log to print Coprocessor preparation completed, wire a 3.3V USB to UART adapter to the C6 connector (board RX to adapter TX, board TX to adapter RX, GND to GND, never 5V logic), hold C6 BOOT, tap C6 RESET, release BOOT, verify with Chip Info read before erasing anything, flash the matching C6 network adapter binary at 0x0, then reflash the P4 app and power cycle the whole device. If flashing fails, recheck the prep message, the RX/TX cross, 3.3V logic and that no other program holds the COM port. The quick start guide walks this with photos.
Common gotchas collected from the wiki and repo FAQ: update the C6 firmware before blaming WiFi, use the right side USB-C for P4 flashing, disable RTS flow control in the terminal, select the correct example before building, init submodules with --recursive, and never select external antenna in software without a load on MMCX1.
What Hams Actually Do With It
This board is overkill for blinking an LED and just right for portable radio jobs that need screen plus radio plus position in one hand:
- Mesh messenger: LoRa plus GPS plus AMOLED plus speaker plus mic plus vibration plus SD equals a self contained off grid text, position and photo terminal. The M-Core project already lists the T-Display P4 as fully supported on both AMOLED and TFT variants, which is the fastest path from unboxing to mesh chat.
- SOTA and POTA field computer: GPS grid, RTC time, IMU compass, gauge watts thinking, SD log files and a sunlight readable UI for spots, alerts and checklists. Pair with the llog minimalist Linux logger back at base for ADIF discipline.
- APRS and tracker display:Decode or gateway packets over LoRa or WiFi, plot heard stations on a touch map, and keep the APRS path guide handy so WIDE settings stay sane.
- Shack remote: Ethernet or WiFi front panel for rotators, power sequencing or antenna switching, in the spirit of the N4MI Stream Deck shack automation post but pocket sized.
- RF survey tool with the keyboard deck: CC1101 plus NRF24L01 plus NFC plus SX1262 makes a legit interference hunting and access control audit kit. Stay inside your license and local rules, and keep the ham use (antenna checks, feedline fault walks, club site surveys) separate from anything that transmits where it shouldn’t.
Honest limit from the MakerGuides review: mature ESP32-S3 RF firmware such as Bruce and ESP32-DIV hasn’t been ported to the P4 RISC-V target, so don’t buy this expecting a drop in Flipper style toolset on day one. Buy it for ESP-IDF projects, LVGL interfaces and mesh stacks that already target the P4, or budget time to port.
T-Display P4 vs Other LilyGO Handhelds
| Board | Processor and memory | Display | Radios | Best for |
|---|---|---|---|---|
| T-Display P4 | ESP32-P4 360 MHz dual core, 16 MB flash, 32 MB PSRAM plus ESP32-C6 coprocessor | 4.1 inch 568 x 1232 AMOLED touch or 4.05 inch 540 x 1168 TFT touch | SX1262 or LR2021 LoRa, WiFi 6, BLE, GPS, Ethernet, NFC plus CC1101 plus NRF24L01 with keyboard deck | Pocket mesh messenger, field maps, camera notes, LVGL apps. Buy here |
| T-Deck | ESP32-S3, 16 MB flash, 8 MB PSRAM | 2.8 inch 320 x 240 TFT plus QWERTY plus trackball | SX1262 LoRa, WiFi, BLE, optional GPS | Keyboard first Meshtastic chat on a mature S3 software base |
| T-Beam | ESP32-S3 or older ESP32, smaller RAM | 0.96 inch OLED status only | SX1262 LoRa, GPS, WiFi, BLE | Headless tracker and solar node, phone app as the screen |
| T-Watch S3 | ESP32-S3, 16 MB flash, 8 MB PSRAM | 1.9 inch 320 x 170 TFT touch | WiFi, BLE, LoRa on some variants | Wrist alerts and control, not maps or text entry |
| T-Embed CC1101 | ESP32-S3 with encoder dial | 1.9 inch TFT | CC1101 sub GHz plus NRF24L01 plus WiFi and BLE | Sub GHz remote and audit remote where P4 software is not needed |
Pick the P4 when the interface is the project: maps, images, touch lists and camera. Pick the T-Deck when you want keyboard chat today on stable S3 firmware. Pick the T-Beam when the node lives on a mast and your phone is the display.
Price, Versions and Where to Buy
Official store price is $119.30 for the board, with AMOLED 4.1 inch and TFT 4.05 inch display options, SX1262 or LR2021 radio options in 400 to 520 MHz or 830 to 945 MHz, and China or Germany warehouse options. The keyboard deck sells separately on its own keyboard page. At write time the official listing showed sold out variants, which is common after a popular review wave.
If the official store is out of stock or shipping looks slow, check this buy link for current sellers, bundles and delivery estimates. When ordering, match three things to your plan: display (AMOLED for contrast, TFT for value), radio band (433 versus 868/915 for your country), and radio chip (SX1262 for mesh compatibility, LR2021 where supported). Add a 3.3V USB to UART adapter and a proper MMCX antenna to the same basket if you don’t own them, because the C6 flashing flow and external antenna path both assume you have them.
Two customer reviews on the official page average 3.5 out of 5. One buyer praises two working units while reporting a third with a charging fault and slow support response, which LilyGO answered publicly with a follow up promise. Treat that as a normal reminder: test charge, display, touch, GPS, LoRa and camera in the first week, inside the return window, and keep the box until the burn in passes.
Setup Checklist for First Boot
- Charge fully on the left USB-C before first flash, then power cycle once.
- Flash and boot factory LilygoBox first, confirm touch, audio, IMU, GPS fix outdoors, SD mount and gauge readout.
- Update the ESP32-C6 coprocessor firmware before judging WiFi, then reflash the P4 app.
- Fit the MMCX antenna before any external antenna test or LoRa TX test.
- Set BQ27220 design capacity to 1000 mAh in your build, run one full calibration cycle.
- Slide the keyboard 21700 switch OFF when the deck is idle.
- Back up the factory binary and your partition table before custom builds, so recovery is one flash away.
Sources and Further Reading
- LilyGO T-Display P4 Product Page
- Buy the T-Display P4
- T-Display P4 Keyboard Product Page
- T-Display-P4 GitHub Repository
- LilygoBox ESP-IDF Factory Firmware
- LilyGO Device Driver Examples
- T-Display P4 Documentation Wiki
- T-Display P4 Quick Start and Flashing Guide
- M-Core P4 Hardware Support Notes
- MakerGuides T-Display P4 and Keyboard Review
- ESP-IDF Get Started for ESP32-P4
- Espressif Online Firmware Flashing Guide
- Semtech SX1262 LoRa Radio
- llog Minimalist SOTA and POTA Logger
- APRS Wide Path Configurations Guide
- N4MI Stream Deck Shack Automation
73 de 9M2PJU

Post Comment